The PT Boat Forum
http://www.ptboatforum.com/cgi-bin/MB2/netboard.cgi
ģ Forum Category: PT Boats of WWII
http://www.ptboatforum.com/cgi-bin/MB2/netboard.cgi?cid=101&fct=showf
ģ Forum Name: PT Boats - General
http://www.ptboatforum.com/cgi-bin/MB2/netboard.cgi?fct=gotoforum&cid=101&fid=102
ģ Topic:
Another 1/35 PT-109 Build-Almost from the Box!
http://www.ptboatforum.com/cgi-bin/MB2/netboardr.cgi?cid=101&fid=102&tid=3176
Greetings Fellow Modelers,
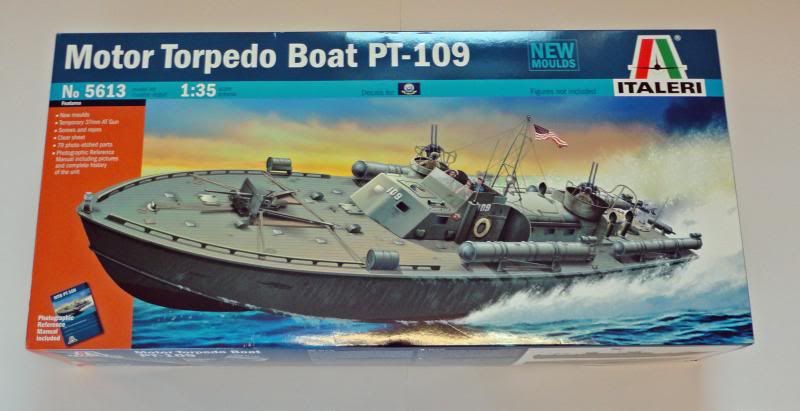
I am new to this site and this is my first time to post. I found the site after I bought Italeris PT-109 kit and read David Waples excellent (in the box) model review on modelwarships.com. I have found many of the posts very educational and entertaining. Unlike some other builds posted, this one is very close to straight from the box and will depict PT-109 at the time of her sinking (i.e. overall green scheme with 37mm AT gun). Dont get me wrong, I admire the modelers who have a great deal of knowledge about the subject and want to make corrections. I just know if I tried to make the same modifications, the project would bog me down and I would not enjoy it. I am very impressed with the kit and grateful to Italeri for producing it. I hope you enjoy following this. Any comments are welcome, just keep in mind I will only be able to answer modeling questions and probably no PT boat technical/historical questions. I have been working on this for several weeks so I have a lot to show. Lets get started
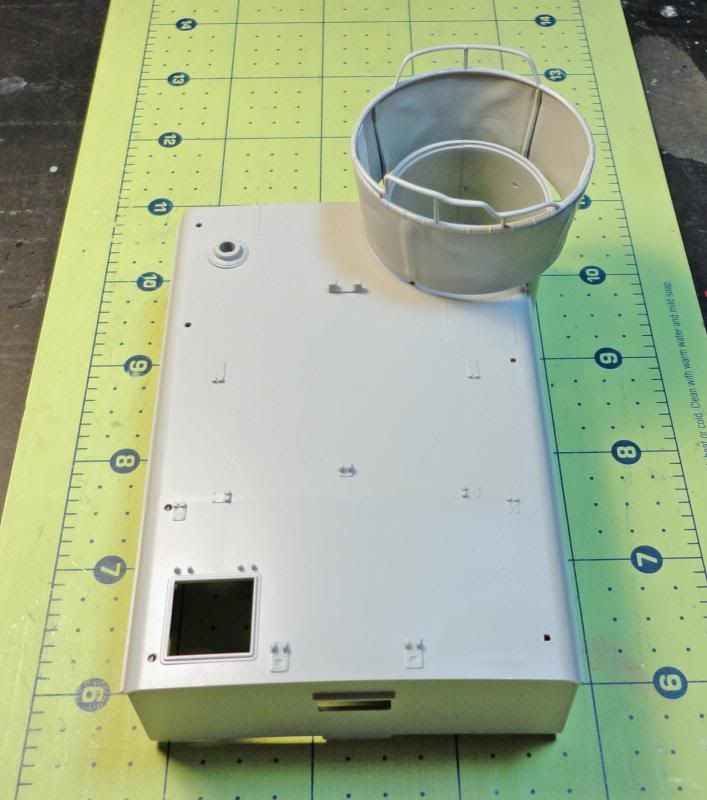
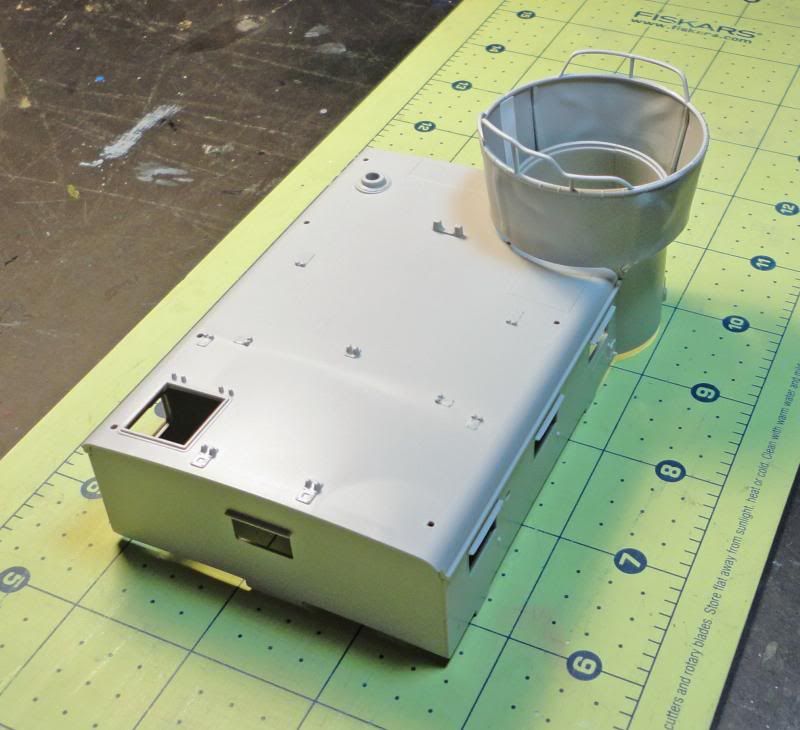
The photos below show:
1st Image: The kit box top art-excellent!
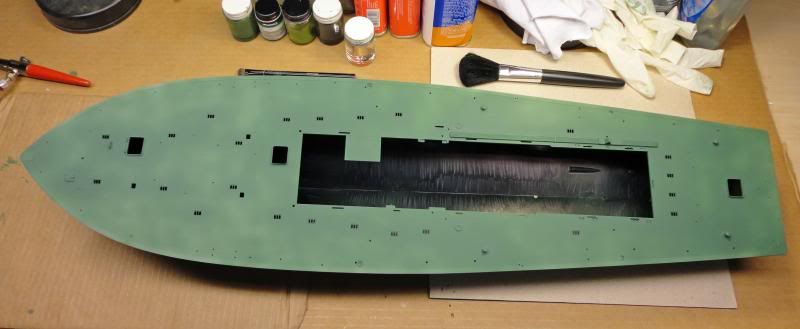
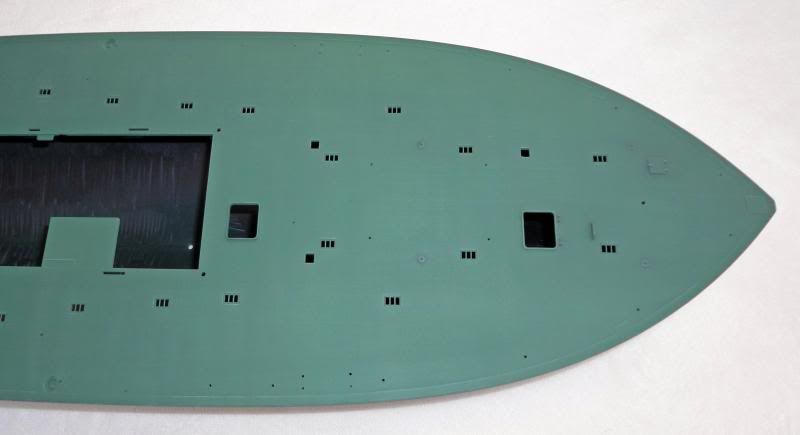
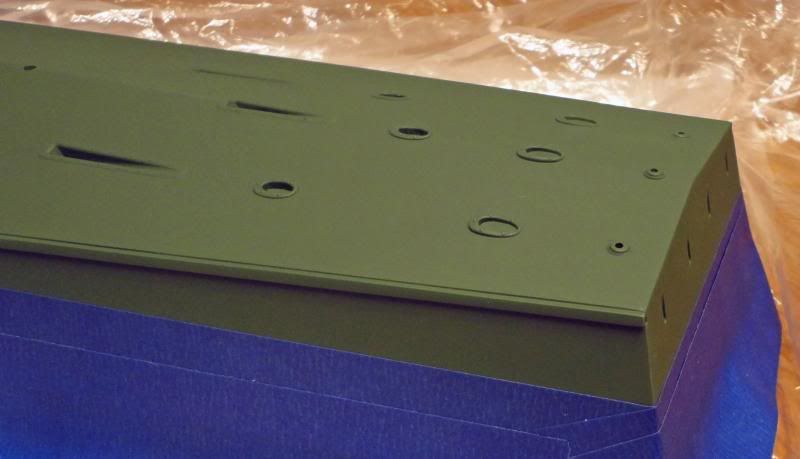
2nd Image: After the little nicks and imperfections hull on the hull were sanded away, a black marker colored the interior. This was done so nothing would be able to be seen through the many vent openings on the deck.
3rd Image: The lower side deck vent/hatch openings were painted with the exterior color called out in the instructions (Model Master Flat Medium Green FS 34102). I am not happy with this color and Im still looking for another color to use on the exterior.
4th Image: The chines (six pieces) are shown after being added to the hull. Some filler superglue and careful sanding were required to make the connection seamless at the bow. Fortunately David Waples gave me some guidance to make sure I did not install the chines upside down.
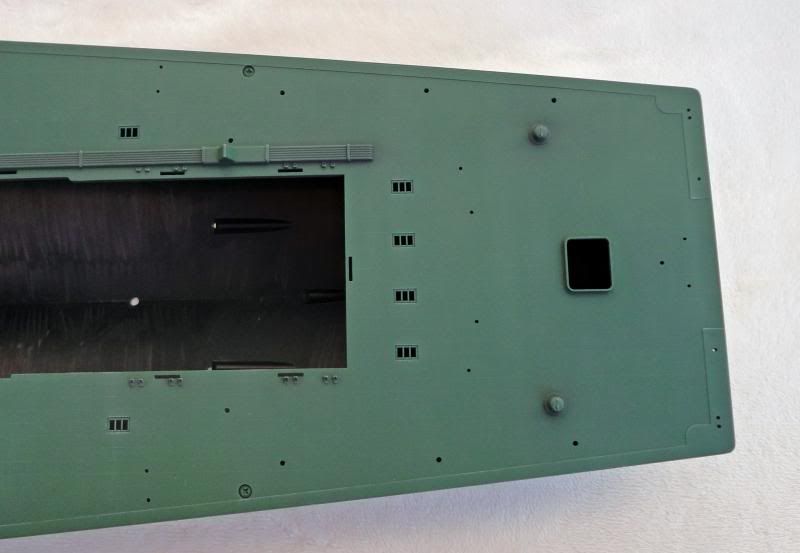
5th Image: After the screw hole covers were added to the deck, superglue was applied around the edges and the seams sanded way.
6th Image: The bow screw cover had a sink mark in it. My solution was to cover the area with a .015 piece of styrene. It was sized to fit against the kits photo-etch bow guard (Part PH1).
7th Image: A small styrene strip was added to deck Part 33C to make it fit better to the main deck.
8th Image: The kit provides clear window parts to put under the photo-etched deck vents, but I opted not to use them. Instead the vents were glued in place, with plans to add Krystal Kleer with a toothpick into the openings after the exterior is painted.
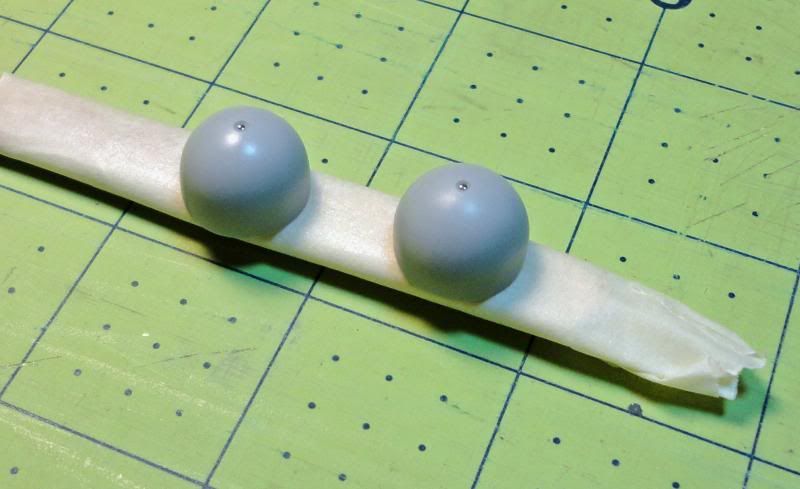
9th Image: This photo shows one of the kits support stands. It required a lot of cleanup to remove the injection pin and sink marks. It was painted Model Master Gun Metal and dry brushed with Model Master Dark Ghost Gray.
10th Image: This photo shows the finished base. The kits two stands were attached to a wooden base with screws. Two matching holes were drilled in the hull to match the small nails in the V-section of the stands.
11th Image: The hull is shown being test fitted to the finished base.
[red][b](image links repaired for viewing - Dick . . . )[/b][/red]
[URL=http://s646.photobucket.com/user/gatosub/media/001-16_zpsce7a48c2.jpg.html][image]http://i646.photobucket.com/albums/uu186/gatosub/001-16_zpsce7a48c2.jpg[/image][/URL]
[URL=http://s646.photobucket.com/user/gatosub/media/002-12_zps5d54b787.jpg.html][image]http://i646.photobucket.com/albums/uu186/gatosub/002-12_zps5d54b787.jpg[/image][/URL]
[URL=http://s646.photobucket.com/user/gatosub/media/003-14_zpsdd5e91af.jpg.html][image]http://i646.photobucket.com/albums/uu186/gatosub/003-14_zpsdd5e91af.jpg[/image][/URL]
[URL=http://s646.photobucket.com/user/gatosub/media/004-14_zps8d437537.jpg.html][image]http://i646.photobucket.com/albums/uu186/gatosub/004-14_zps8d437537.jpg[/image][/URL]
[URL=http://s646.photobucket.com/user/gatosub/media/005-10_zps75a6ef24.jpg.html][image]http://i646.photobucket.com/albums/uu186/gatosub/005-10_zps75a6ef24.jpg[/image][/URL]
[URL=http://s646.photobucket.com/user/gatosub/media/006-12_zpsd864c9de.jpg.html][image]http://i646.photobucket.com/albums/uu186/gatosub/006-12_zpsd864c9de.jpg[/image][/URL]
[URL=http://s646.photobucket.com/user/gatosub/media/007-9_zps84055d50.jpg.html][image]http://i646.photobucket.com/albums/uu186/gatosub/007-9_zps84055d50.jpg[/image][/URL]
[URL=http://s646.photobucket.com/user/gatosub/media/008-13_zps0548280f.jpg.html][image]http://i646.photobucket.com/albums/uu186/gatosub/008-13_zps0548280f.jpg[/image][/URL]
[URL=http://s646.photobucket.com/user/gatosub/media/009-12_zps839130bf.jpg.html][image]http://i646.photobucket.com/albums/uu186/gatosub/009-12_zps839130bf.jpg[/image][/URL]
[URL=http://s646.photobucket.com/user/gatosub/media/010-12_zpsd23d072c.jpg.html][image]http://i646.photobucket.com/albums/uu186/gatosub/010-12_zpsd23d072c.jpg[/image][/URL]
[URL=http://s646.photobucket.com/user/gatosub/media/011-11_zps3259c8c6.jpg.html][image]http://i646.photobucket.com/albums/uu186/gatosub/011-11_zps3259c8c6.jpg[/image][/URL]
Until next time...
Phillip
Posted By: Phillip Gore | Posted on: May 7, 2013 - 9:08pm
Total Posts: | Joined: Unregistered
Keep the photos of your work coming, Phil.
Most of us on this site enjoy seeing any modeler's progress on the building of this great PT boat kit.
Posted By: Drew Cook | Posted on: May 8, 2013 - 6:03pm
Total Posts: 1306 | Joined: Oct 19, 2006 - 10:44am
Greetings Fellow Modelers,
Here are few more progress photos.
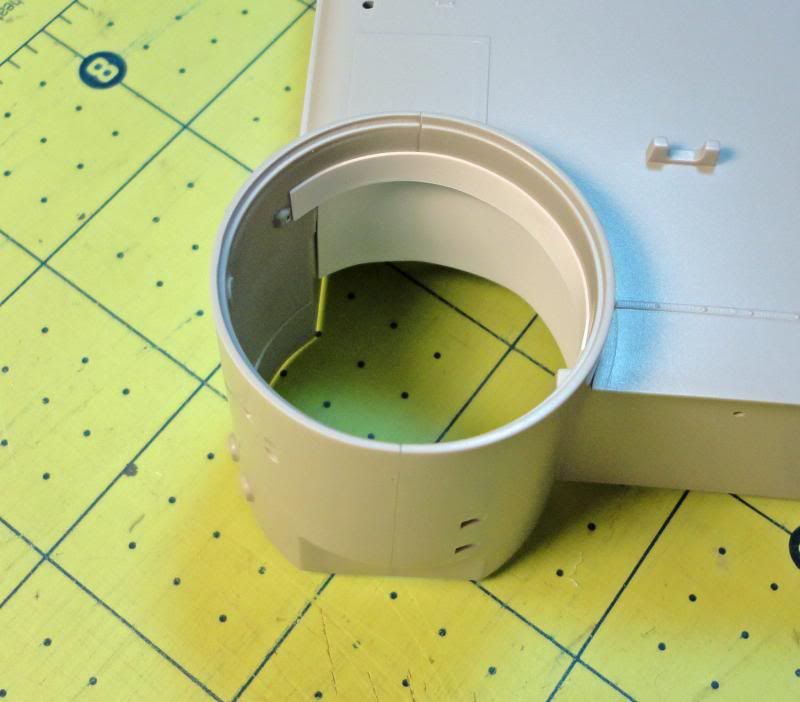
1st Image: Although the kit is really impressive in its details and engineering, the low point (for me) has to be the offset mold line down the middle of many of its parts. This is caused by the two factory patterns halves not matching up perfectly when the melted plastic is injected. The result is shown in the photo. The muffler on the left is has not been cleaned up and has an ugly mold line that has to be cut/sanded away. The muffler on the right had been cleaned up and is ready for painting. Unfortunately, many parts suffer from this problem. It is causes some tedious headaches, but nothing too major.
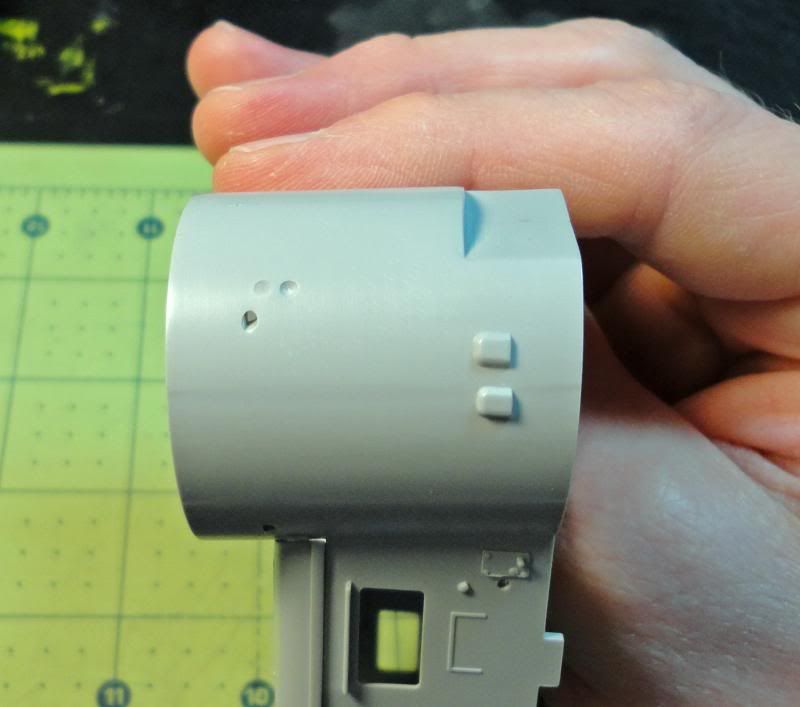
2nd Image: The raised structure that goes on the engine hatch is shown assembled and ready for painting.
3rd Image: The basic chart room assembly is shown. The connection point between the top and side parts has been filled with superglue and sanded/polished to look like a single piece.
4th Image: I noticed the chart room sides bowed in when they were glued in place. To correct this, a 1/4 X 1/4 styrene piece was added to push the sides back out. This was required to make the fit between the chart room assembly and main deck was as good as possible.
5th Image: One of the few modifications I did make was cutting a piece of .015 styrene to represent the steel cover plate on the left, inside cockpit wall. The kit provides a small photo etch part for this, but it is way too small. Notice another small styrene piece was added to the left wall to cover an injection pin mark. The still present injection pin mark at the bottom of the wall will be covered by another kit part, added later.
6th Image: The basic day cabin assembly is shown.
7th Image: Another modification was adding the missing styrene rain lip above the day cabin rear window.
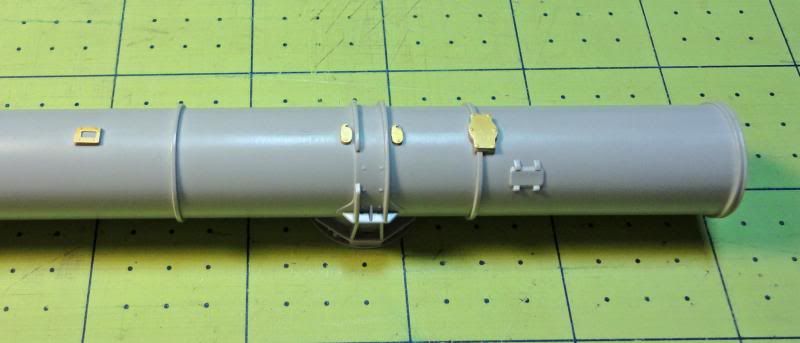
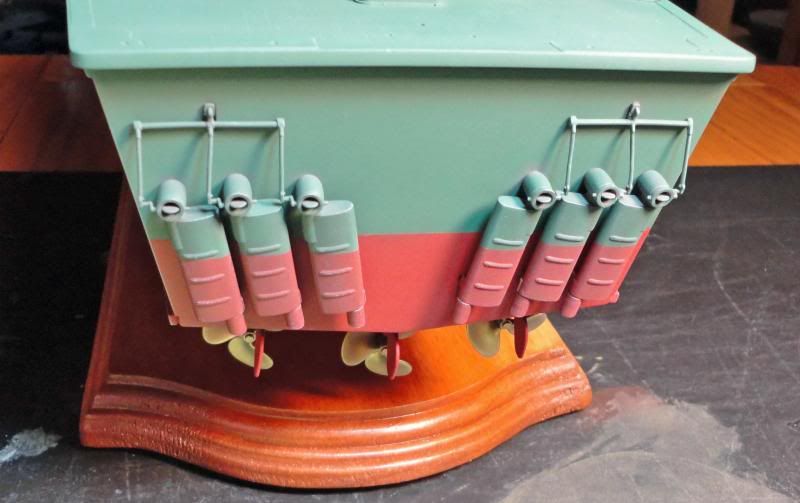
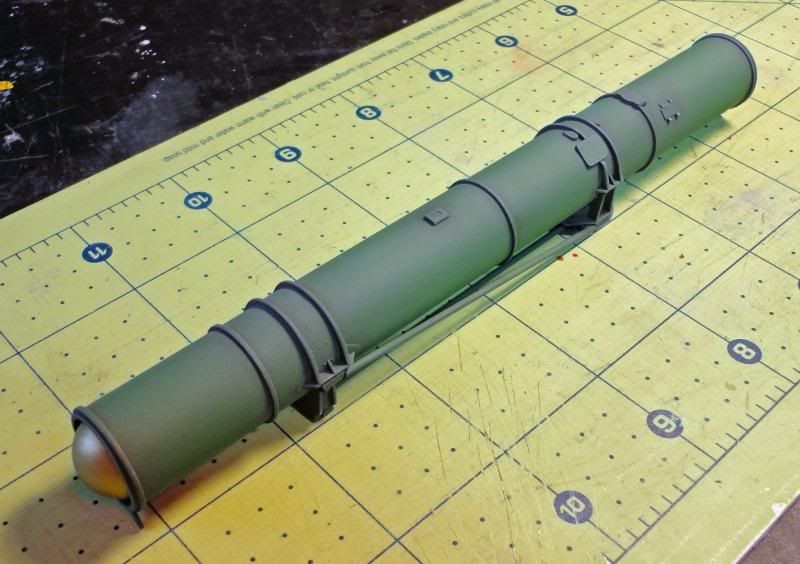
8th Image: Sanding out the seam lines of the four torpedo tubes was exhausting and time consuming, more so than other parts worked on. However, the parts did mate up very well. I used superglue on the inside and Tenax-7R glue on the outside.
9th Image: The four torpedo tubes sanded/polished to perfection (as close as I can get anyway). Man, I was really happy when these were finished. Whew!
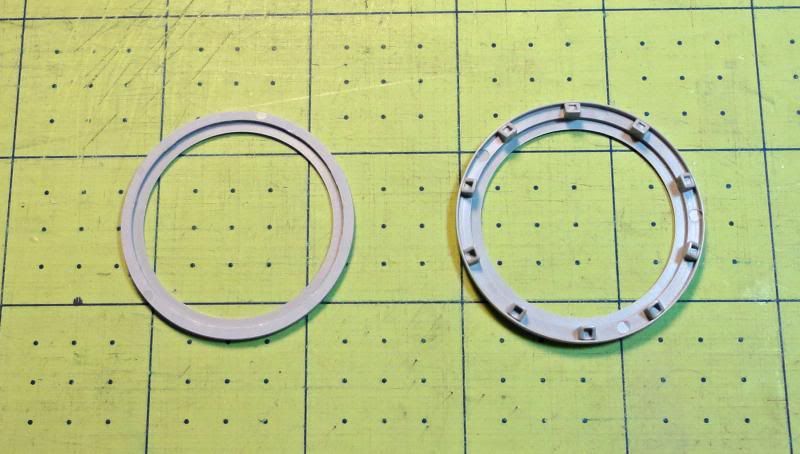
10th Image: I took David Waples kit review advice and removed the molded on torpedo warhead cover straps. The part on the left is the before appearance, and the part on the right is the after appearance. I will still probably locate a hole at the center of each part and add a small drop of epoxy to represent a cover plate or something similar.
11th and 12th Image: These images show one of the torpedo tubes being test fitted to its mounts. The torpedo warhead has also been temporarily put in place and will probably be located further back in the tube. The kits torpedo tube detail is impressive.
13th and 14th Image: Two of the .50 caliber machine guns are shown here, before and after being cleaned up. Once again the mold line is very noticeable. What I want to point out is that after the mold line is removed and the cooling sleeve holes are deepened, the part looks really good (in my opinion). I do not know if I will add scratch built flash suppressors, but I have to say I am happy with the way they look right now.
http://i646.photobucket.com/albums/uu186/gatosub/012-10_zps3a848347.jpg
http://i646.photobucket.com/albums/uu186/gatosub/013-7_zpsa0886ad6.jpg
http://i646.photobucket.com/albums/uu186/gatosub/014-11_zpsba325c29.jpg
http://i646.photobucket.com/albums/uu186/gatosub/015-10_zps999c92f2.jpg
http://i646.photobucket.com/albums/uu186/gatosub/016-10_zpse1486b69.jpg
http://i646.photobucket.com/albums/uu186/gatosub/017-9_zpsf393270b.jpg
http://i646.photobucket.com/albums/uu186/gatosub/018-9_zpsf69a5988.jpg
http://i646.photobucket.com/albums/uu186/gatosub/019-10_zpsda6e53c0.jpg
http://i646.photobucket.com/albums/uu186/gatosub/020-10_zpsd167a343.jpg
http://i646.photobucket.com/albums/uu186/gatosub/021-9_zps49dea960.jpg
http://i646.photobucket.com/albums/uu186/gatosub/023-8_zps32bc56d4.jpg
http://i646.photobucket.com/albums/uu186/gatosub/022-9_zps9685f95d.jpg
http://i646.photobucket.com/albums/uu186/gatosub/024-5_zpsb5077c4e.jpg
http://i646.photobucket.com/albums/uu186/gatosub/025-8_zps873935b9.jpg
Until next time...
Phillip
Posted By: Phillip Gore | Posted on: May 8, 2013 - 6:08pm
Total Posts: | Joined: Unregistered
Thanks as usual, Dick. . .
Will
Posted By: Will Day | Posted on: May 8, 2013 - 10:13pm
Total Posts: | Joined: Unregistered
We enjoy the photos but it would be easier if you read the post about how to post photos. It is not the same as many other sites. This site needs the word IMAGE spelled out between brackets , not IMG. and /IMAGE between brackets, not /IMG. Please keep the photos coming!
[image]http://i646.photobucket.com/albums/uu186/gatosub/012-10_zps3a848347.jpg[/image]
[image]http://i646.photobucket.com/albums/uu186/gatosub/013-7_zpsa0886ad6.jpg[/image]
[image]http://i646.photobucket.com/albums/uu186/gatosub/014-11_zpsba325c29.jpg[/image]
[image]http://i646.photobucket.com/albums/uu186/gatosub/015-10_zps999c92f2.jpg[/image]
[image]http://i646.photobucket.com/albums/uu186/gatosub/016-10_zpse1486b69.jpg[/image]
[image]http://i646.photobucket.com/albums/uu186/gatosub/017-9_zpsf393270b.jpg[/image]
[image]http://i646.photobucket.com/albums/uu186/gatosub/018-9_zpsf69a5988.jpg[/image]
[image]http://i646.photobucket.com/albums/uu186/gatosub/019-10_zpsda6e53c0.jpg[/image]
[image]http://i646.photobucket.com/albums/uu186/gatosub/020-10_zpsd167a343.jpg[/image]
[image]http://i646.photobucket.com/albums/uu186/gatosub/021-9_zps49dea960.jpg[/image]
[image]http://i646.photobucket.com/albums/uu186/gatosub/023-8_zps32bc56d4.jpg[/image]
[image]http://i646.photobucket.com/albums/uu186/gatosub/022-9_zps9685f95d.jpg[/image]
[image]http://i646.photobucket.com/albums/uu186/gatosub/024-5_zpsb5077c4e.jpg[/image]
[image]http://i646.photobucket.com/albums/uu186/gatosub/025-8_zps873935b9.jpg[/image]
Posted By: ducati650 | Posted on: May 9, 2013 - 5:00am
Total Posts: 450 | Joined: Feb 19, 2007 - 10:01am
Just a curiosity question...Why did you use a marker to color the inside of the hull? Seems like a tedious undertaking. Wouldn't a can of black spray paint have been faster?
Charlie
Posted By: 29navy | Posted on: May 9, 2013 - 5:33am
Total Posts: 611 | Joined: Dec 28, 2006 - 3:02pm
ducati650-I apologize for the photo posting mis-steps and will do better on future posts. I appreciate the help (and patience) I have been given.
Drew-Thanks for the compliment.
29navy-I used a very large marker with a flat tip on the end so it really did not take that long. I saw another modeler do this on a different forum and liked the idea more than airbrushing black paint.
Thanks
Phillip
Posted By: Phillip Gore | Posted on: May 9, 2013 - 8:09am
Total Posts: | Joined: Unregistered
No problem, Phillip. It happens a lot with new members. I'm enjoying the photos.
Ed
Posted By: ducati650 | Posted on: May 9, 2013 - 9:35am
Total Posts: 450 | Joined: Feb 19, 2007 - 10:01am
Nice work Phillip. Solid modeling techniques. Keep it coming!
Dave
David Waples
Posted By: David Waples | Posted on: May 9, 2013 - 6:58pm
Total Posts: 1680 | Joined: Jan 2, 2007 - 9:55pm
Ahoy there Phillip.
If I might make a suggestion.
It would be a lot easier to understand what caption pertainsto which image if yoy had a caption, then an image link, a space (Enter key gives one) another cation and another image and so on. That way each image would have its own description and would save having to scroll up and down to figure out which caption goes with which image.
Nice work on the model and nice sharp images.
Thanks for sharing and cheers.
"Give me a fast boat for we want to get out of harm's way too."
Posted By: PeterTareBuilder2 | Posted on: May 9, 2013 - 10:06pm
Total Posts: | Joined: Unregistered
Greetings Fellow Modelers,
Hopeful this post will go better than the last two. Here are last progress photos that show where I am now.
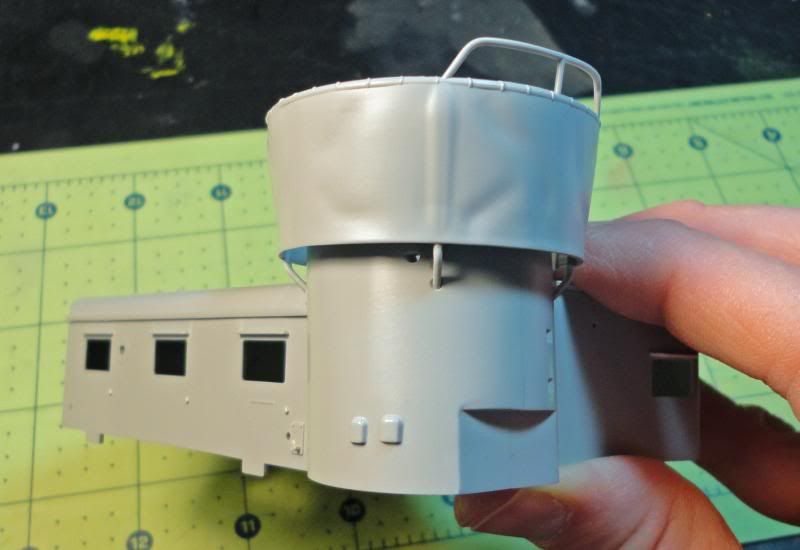
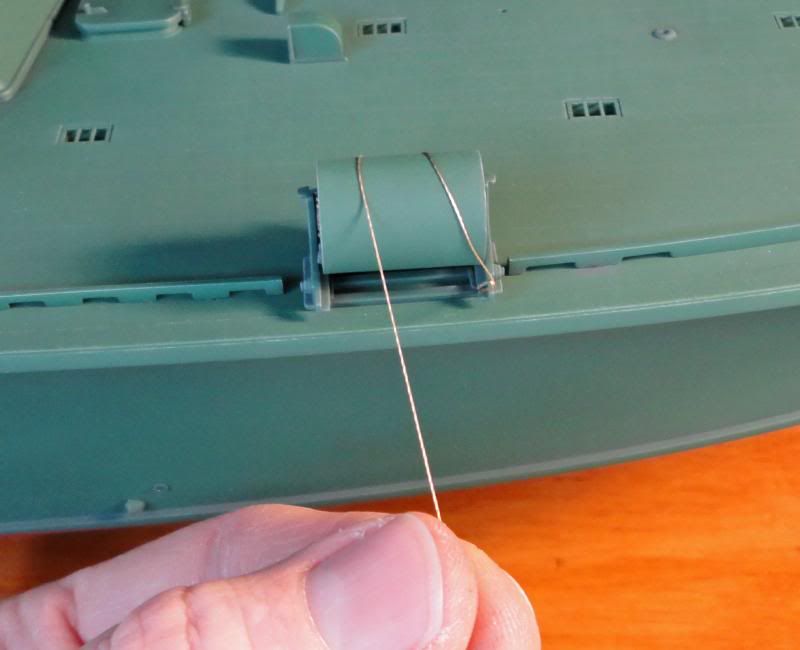
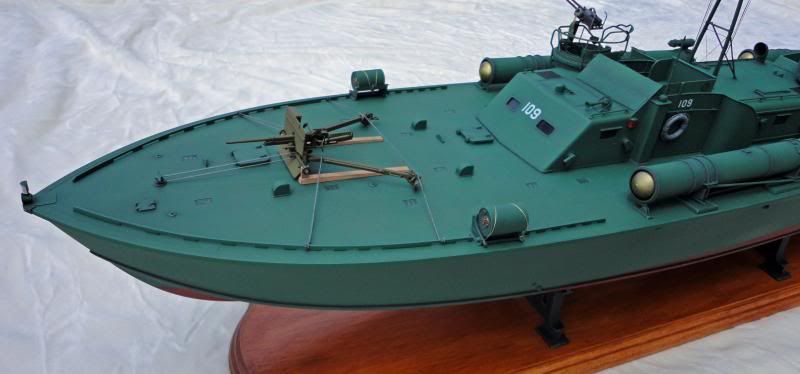
The guidance railing for the forward machine gun turret is shown. The kits two parts were carefully glued together, then the seam line was removed to make it look like a single piece. Needless to say this assembly is extremely fragile!
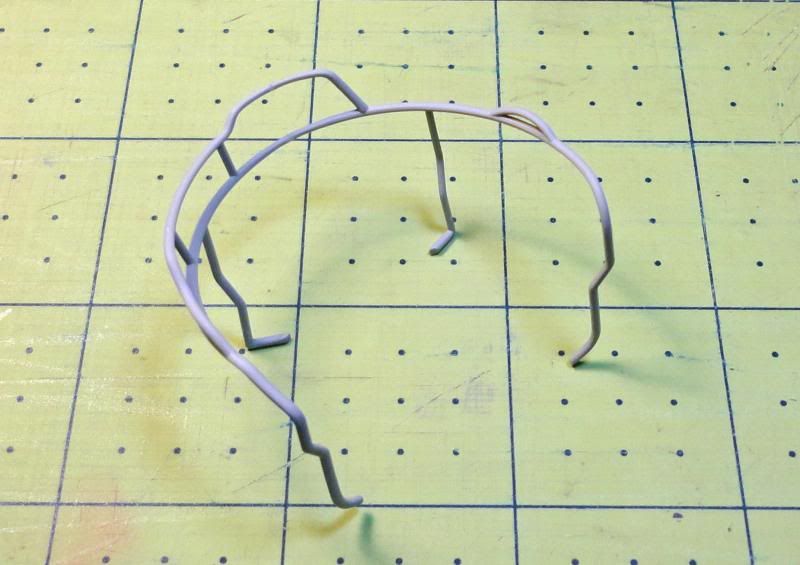
The guidance railing for the forward machine gun turret is shown being test fitted in place.
Using the kit locating holes caused the rear turret guidance railing assembly to lean forward too much (in my opinion). My solution was to drill one new mounting hole about 3/32 lower than the original. It might not be correct to do this, but when I test mounted the day cabin assembly to the hull, the turret guidance railing looked straight (normal) when viewed from the side and rear. Note that small strips of .015 styrene were used to cover the inside canvas seam lines.
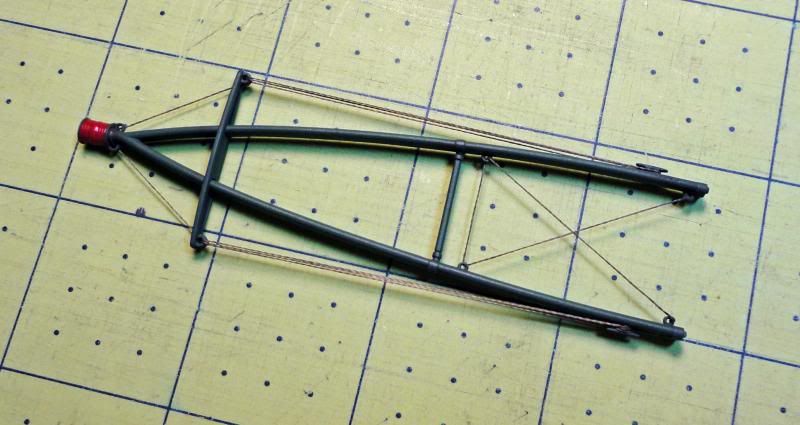
When you look at this photo I know many people are thinking, Why are you test fitting the A frame mast when strong evidence suggest this had been removed from PT-109, even before Kennedy took command? Although the mast should not be on the model I am building, I feel the piece is such an integral part of the look of the 103 class PT boat that I will probably include it. After all, I am the person who is going to be looking at the finished model in the glass display case for the next twenty plus years.
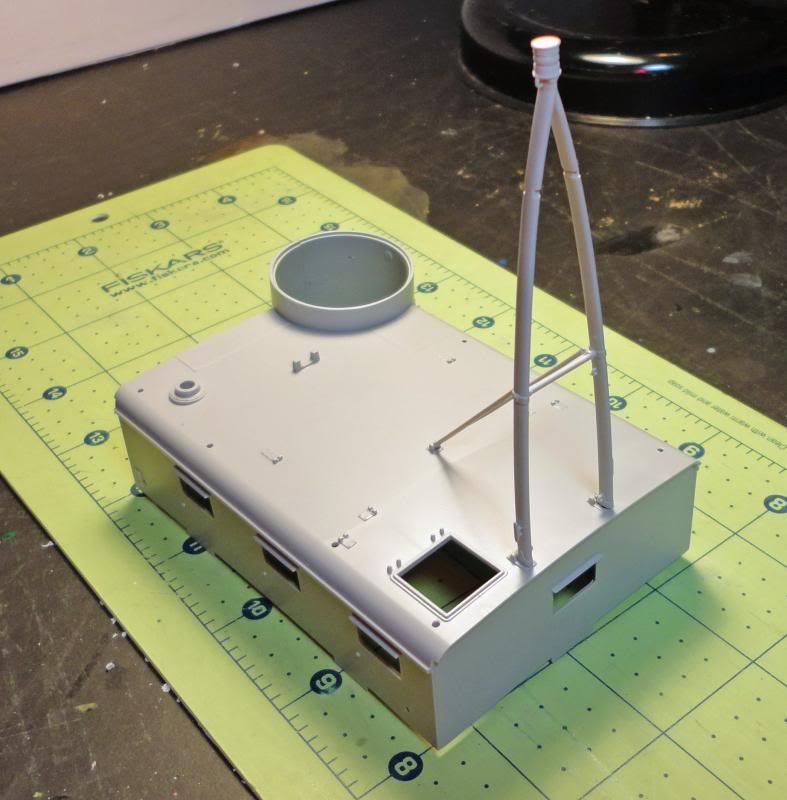
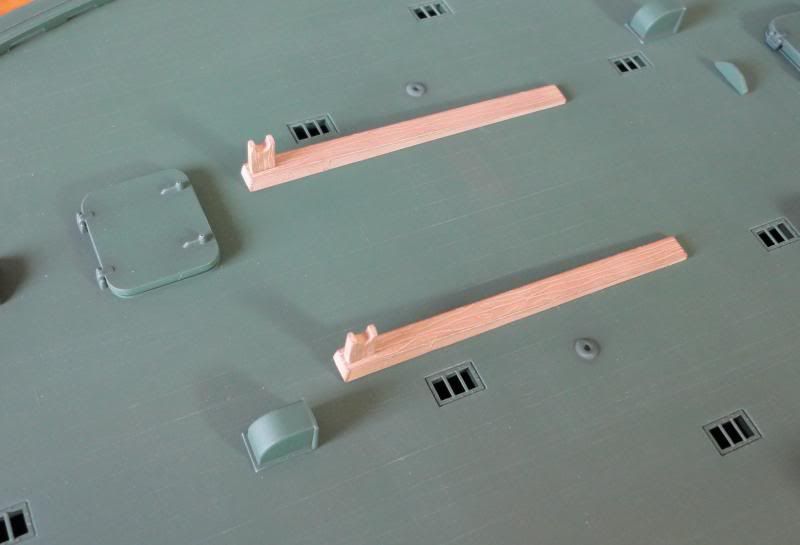
Small styrene pieces were rolled and located in the open holes at the bases of the forward and rear turrets. These were added since the open holes were very noticeable, even after all the machine gun parts were added.
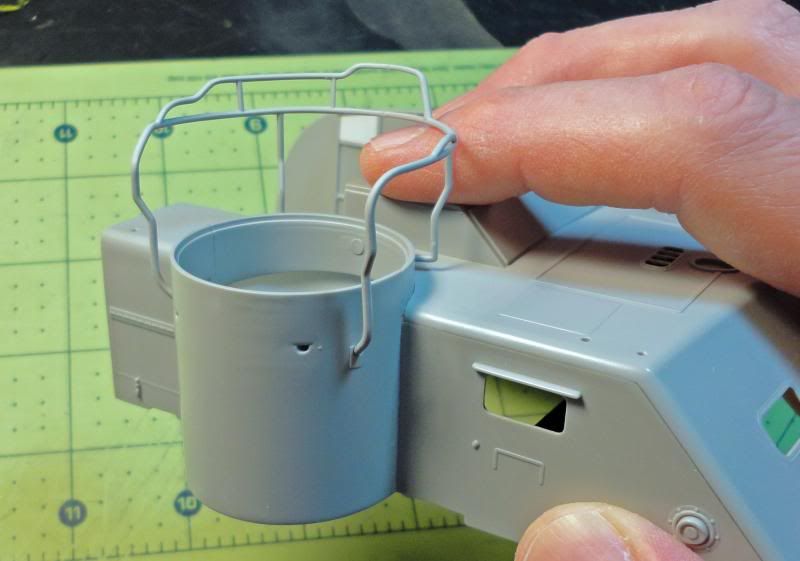
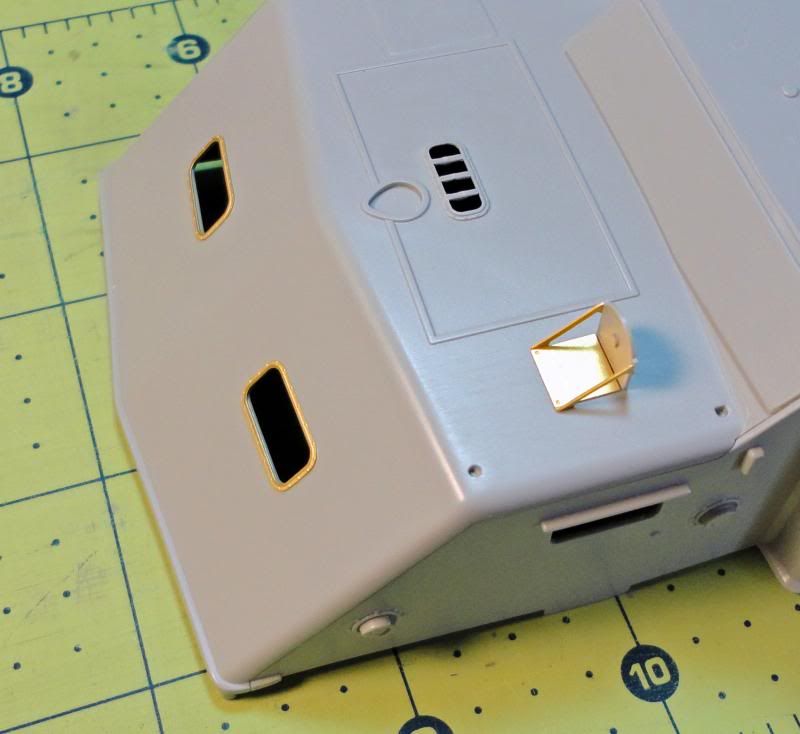
One of the torpedo tubes is shown after adding the kits photo etch parts.

More photo etch parts in place.
Two of the torpedo warheads are shown after the center holes have been drilled, and a small amount of 5-Minute epoxy has been added-leaving a small, smooth bump.
Until next time
Phillip1
Posted By: Phillip Gore | Posted on: May 10, 2013 - 8:04pm
Total Posts: | Joined: Unregistered
Nice clean work Phillip. Excellent construction techniques. Keep it coming!
Dave
David Waples
Posted By: David Waples | Posted on: May 10, 2013 - 9:55pm
Total Posts: 1680 | Joined: Jan 2, 2007 - 9:55pm
Hi Phillip, great work on the 109 the clean up of the join lines does add to the model, and at this scale these things are not small and do stand out.
Just a small point you might want to think about, your 50's clean up does look good but I was wondering why you left the front and rear sights on them.
On the boats the sights front and rear were removed and a cover plate screwed onto the mounting holes to protect them.
Have a look at the last couple of posts there are some photos of the 50's that show this or go to Jeff Ds site his drawings show this quite clearly and are a great guide in this area.
After looking at the booklet that comes with the model I found that it has the photo of the PT109 with the crew on the foredeck, unlike some of the censored photos this has the starboard 50's and with a little work with a scanner and the computer zoom function a good look at them shows this and other details, couldn't get any thing better than that!
D.buck
Posted By: David Buck | Posted on: May 11, 2013 - 2:17pm
Total Posts: 332 | Joined: May 4, 2008 - 2:59am
David Waples-Thanks for the compliment.
David Buck-Thanks for the compliment and suggestions for the .50 guns. I will check out Jeff D's excellent drawings and make the modifications if it looks simple enough.
Below is a construction photo left off the last post.
Two of the torpedo warheads are shown after the center holes have been drilled, and a small amount of 5-Minute epoxy has been added-leaving a small, smooth bump.
Phillip
Posted By: Phillip Gore | Posted on: May 11, 2013 - 4:29pm
Total Posts: | Joined: Unregistered
Greetings Fellow Modelers,
Every part of my model has been cleaned up, test fitted and all of the basic sub-assemblies are complete. Total time on the project at this point is about 120 hours. It is a lot of time but this kit has a large number of pieces (approximately 415 plastic and 70 photo-etched), and this includes finishing the display base.
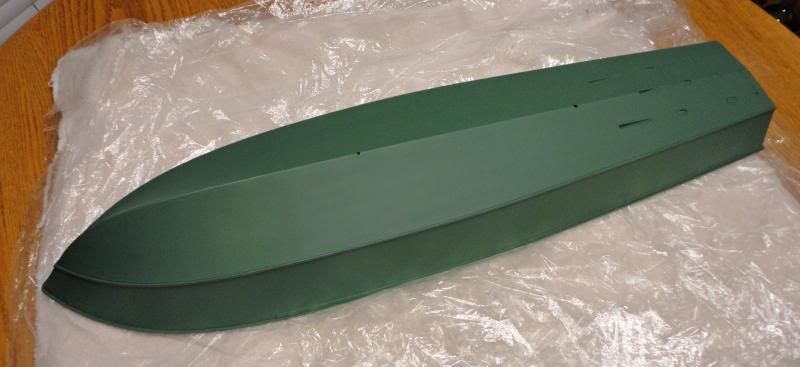
It is time to start painting. After reading multiple posts on this site concerning PT-109s possible exterior color, I have decided to use Model Master Euro Dark Green-1764 (FS34092). I think this color is close to what is shown in the PT-109 color photos David Waples has posted. Since there appears to be no single right answer on this subject, I am content with this choice.
Below are the latest progress photos.
1st Image: A standard painting practice I use is to apply the exterior color in multiple, thin coats. After each coat has dried, a very soft cloth (or wide, flat sable brush) is used to gently buff the paint. Doing this takes more time but eliminates any grainy paint buildup in the corners, and prevents dust from getting trapped in the paint. This photo was taken while the second coat was being applied. I believe a total of four coats were added.
2nd and 3rd Image: After the base color was applied Model Master Dark Ghost Gray-1741 was dry brushed over the entire deck to highlight the raised details and create a washed out look. This same effect will not be added to the deck structures (i.e. day cabin/chart room/engine hatch). Lastly, dark gray pastel dust was brushed over the recesses and corners to create greater shadow and contrast.
Until next time...
Phillip
Posted By: Phillip Gore | Posted on: May 13, 2013 - 7:03pm
Total Posts: | Joined: Unregistered
Really nice work Phillip. I have been watching your build as I have been speed building my 157. I like your choice of color for your 109 and is one I'm considering when I get started on my 109 next. I am wondering if you are going to give the final project a shot of dull coat or leave a good thing alone since you have used chalks in your weathering. I found any over spray will do a number on a "chalk" weathered project.
Great work.
Posted By: Roy Forbes | Posted on: May 17, 2013 - 9:05am
Total Posts: 371 | Joined: Sep 5, 2012 - 4:57pm
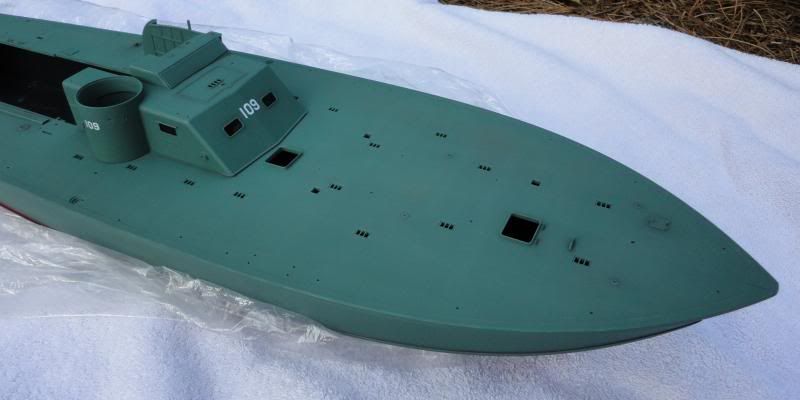
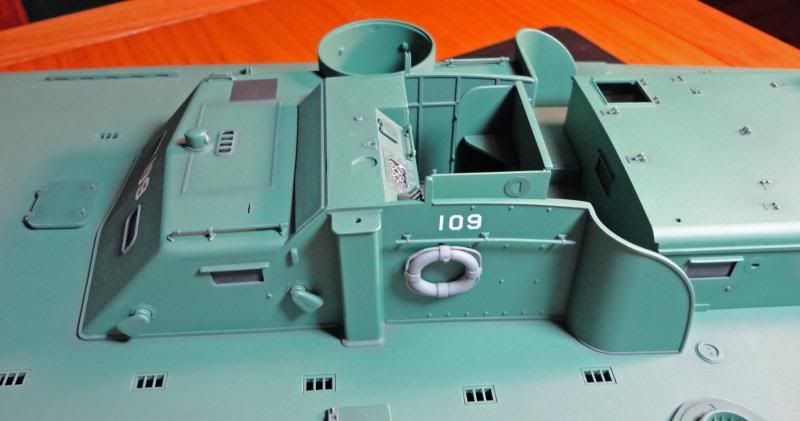
Greetings Fellow Modelers,
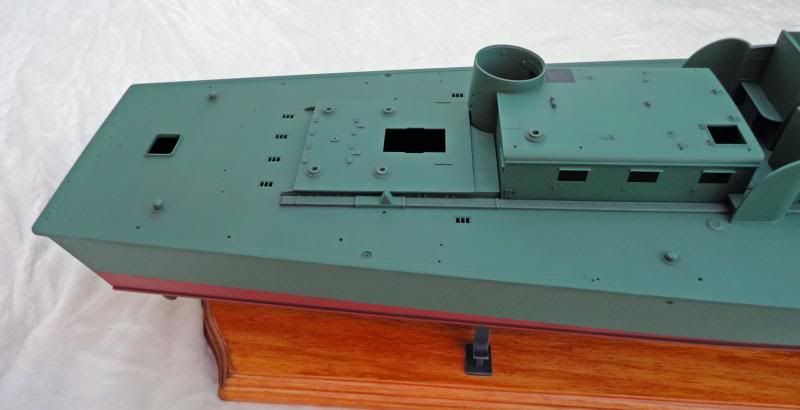
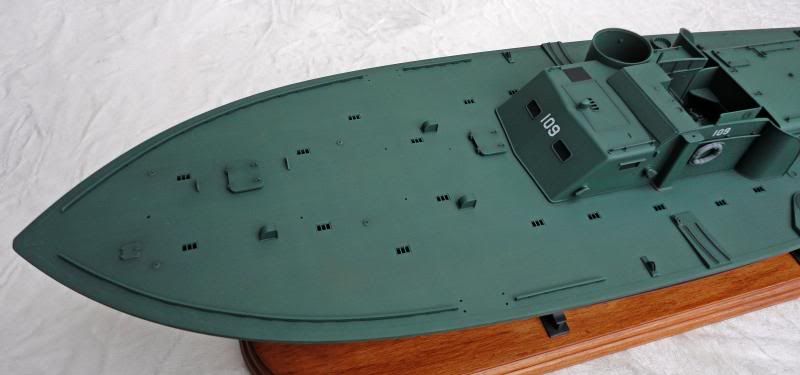
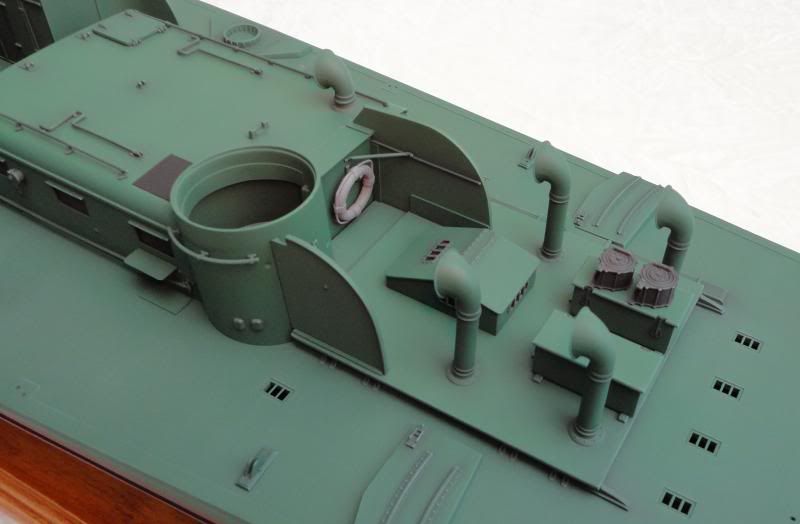
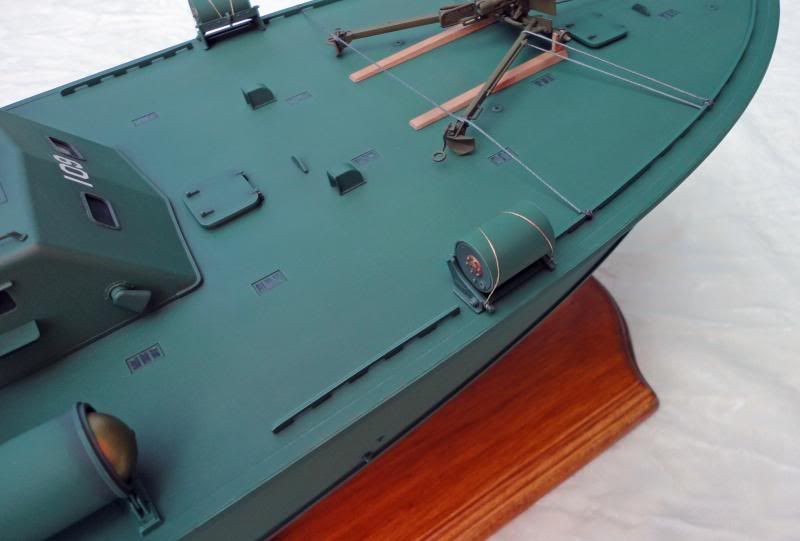
The latest painting and assembly work is shown below:
1st and 2nd Image: More photos of the deck and hull with the green color applied. Hopefully you can see the deck color is not uniform, but varies in tone a good bit thanks to the Dark Ghost Gray dry brushing.

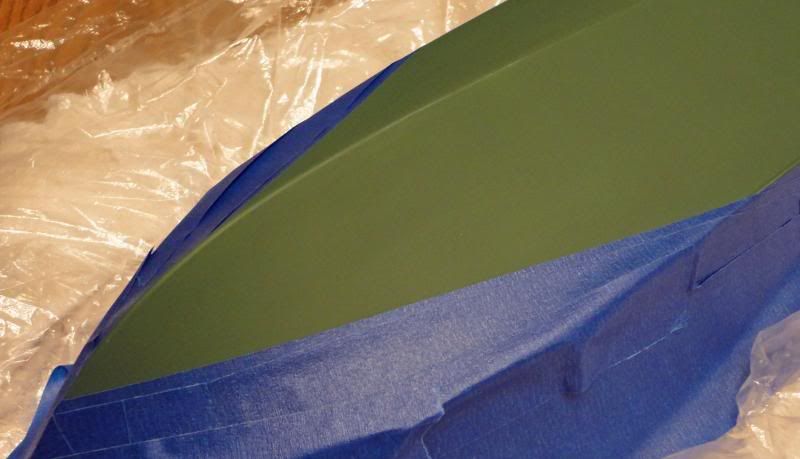
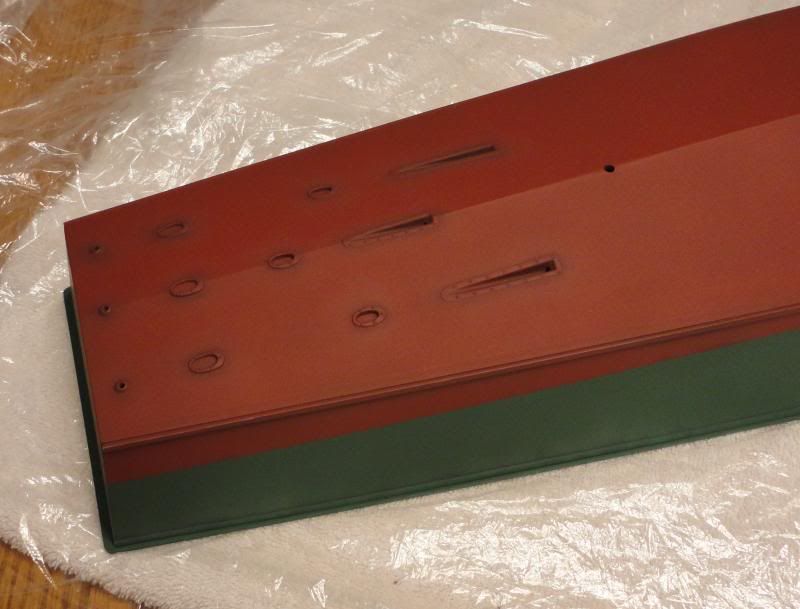
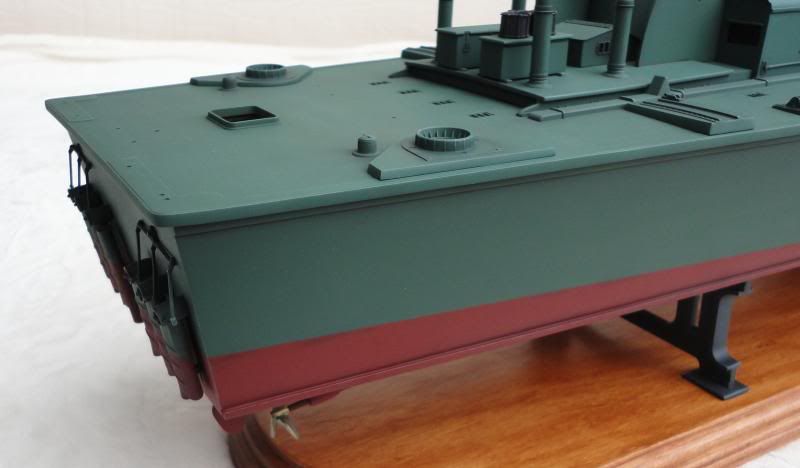
3rd and 4th Image: Work moves to painting the area below the waterline. I used painters tape instead of regular masking tape to reduce the chance of pulling up the green paint.
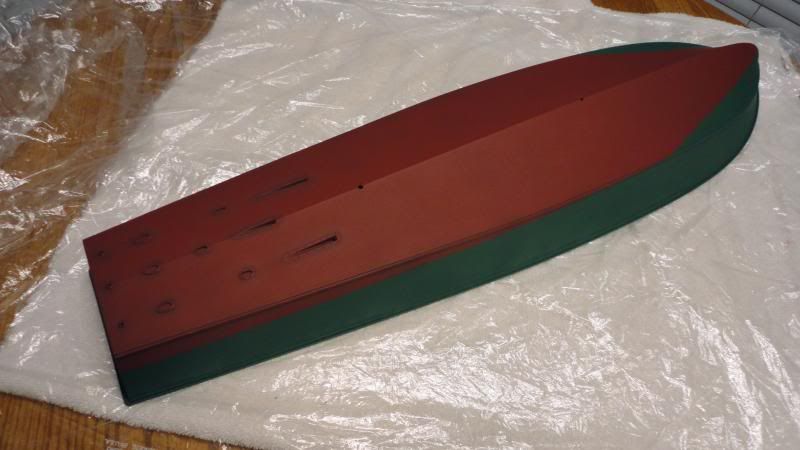
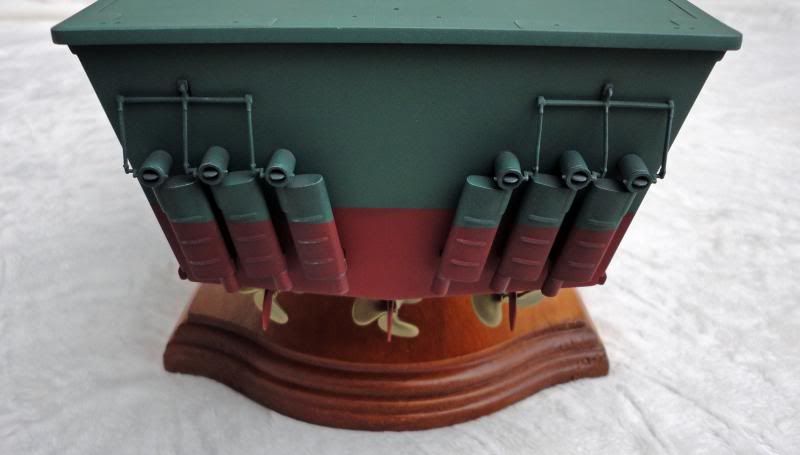
5th Image: For the lower hull color I used a 50/50 mix of Model Master Insignia Red-1705 (FS31136) and Model Master Rust-1785. The photo shows the hull after painting and removing the tape. Dark gray pastel dust has been applied to the drive shaft openings, drive shaft supports and rudder areas.
6th Image: Dark gray pastel powder was carefully applied with a small brush along the hull, right below the waterline to represent discoloration.
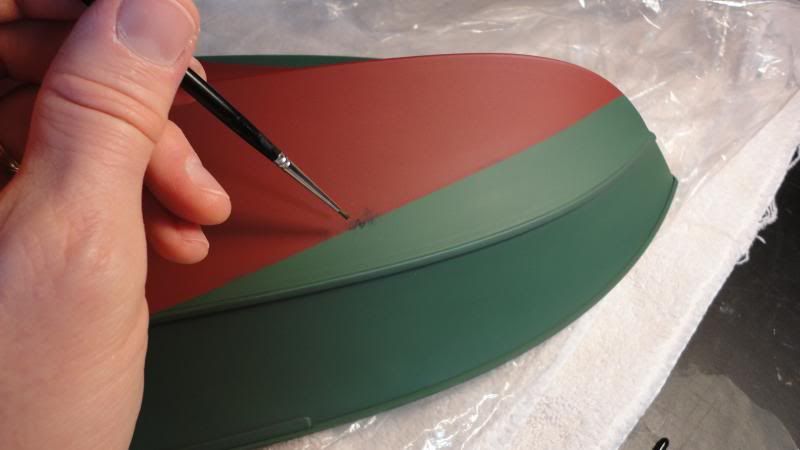
7th Image: Close up of the bow showing the sharp demarcation of the waterline. This photo gives a good representation of the green and red colors used.
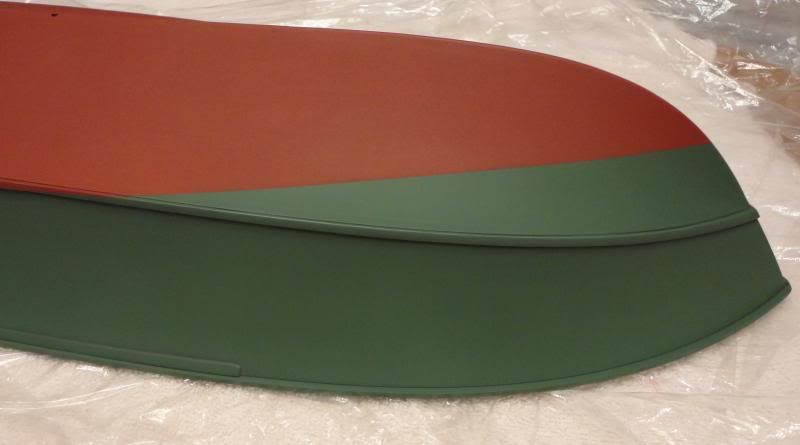
8th Image: Close up of the stern. Unfortunately after the lower hull was painted, I realized I missed the location of the waterline by approximately 3/16 (too high). I wish I had been more careful
but its all good.
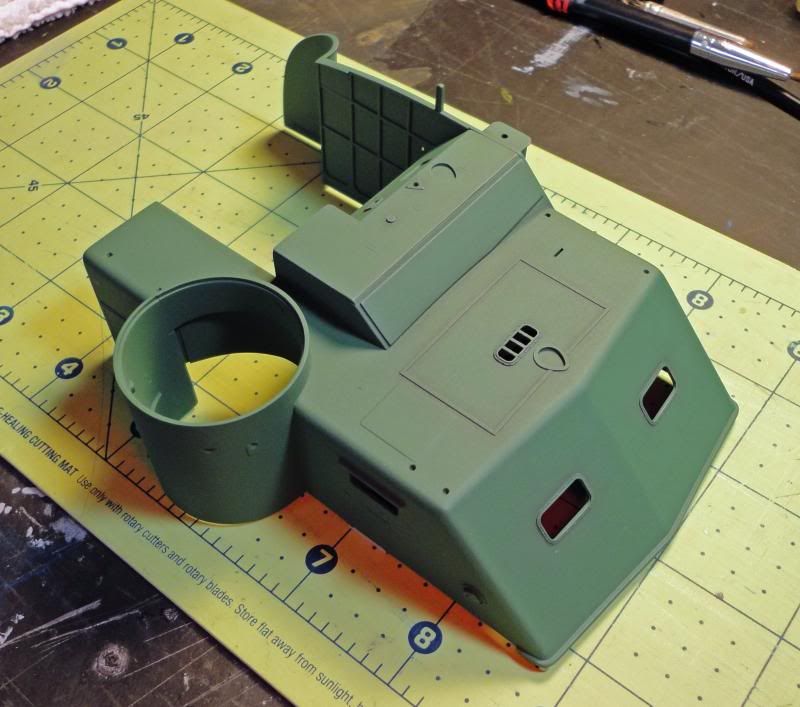
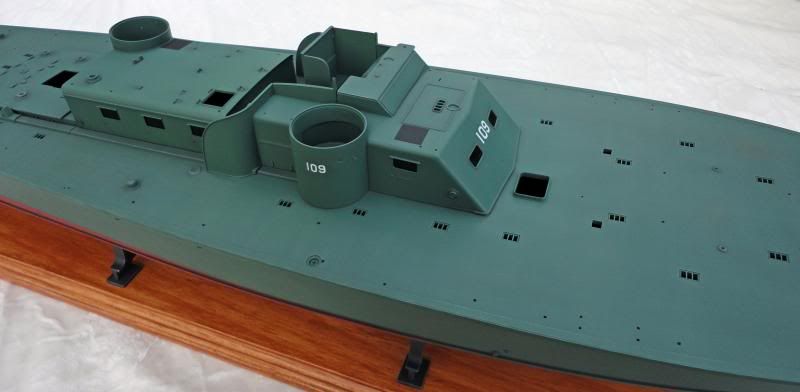
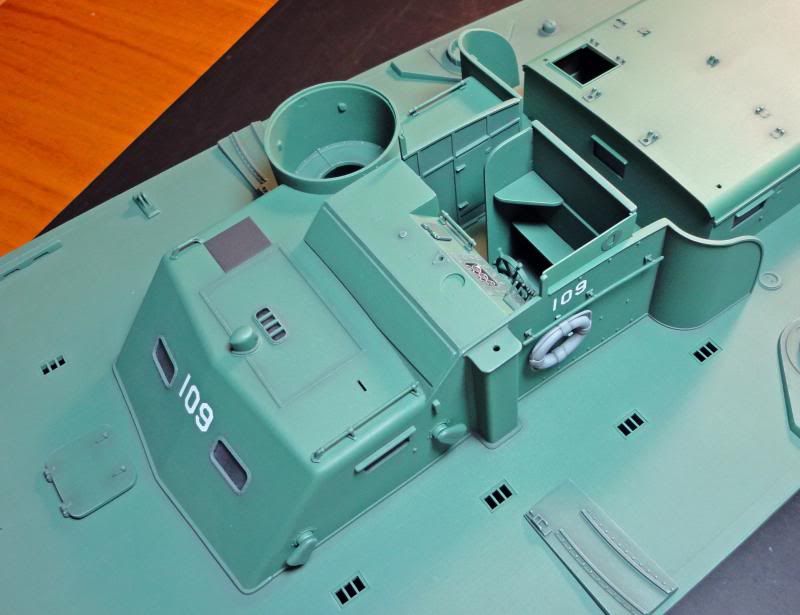
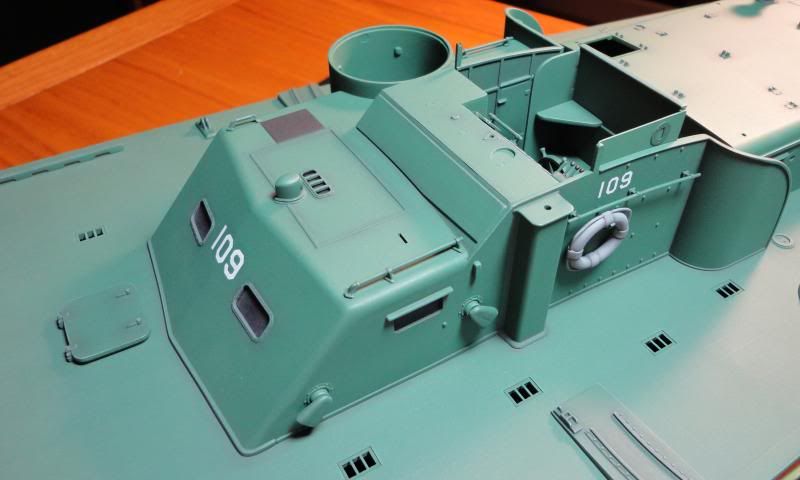
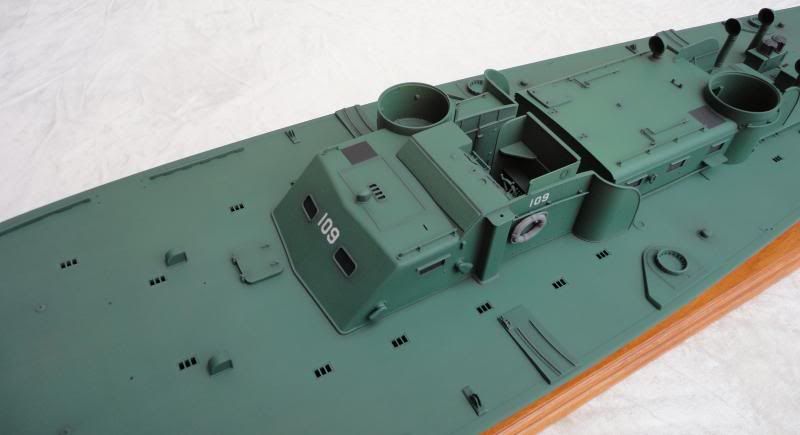
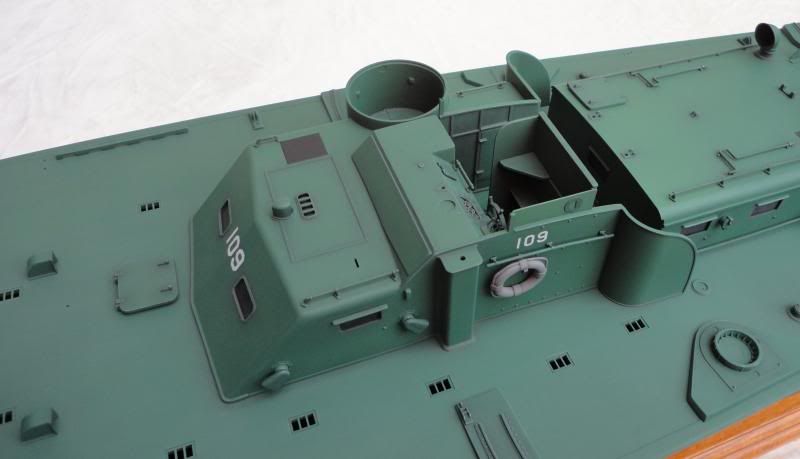
9th Image: The chart room is shown after paint, pastel dust and light dry brushing have been applied.
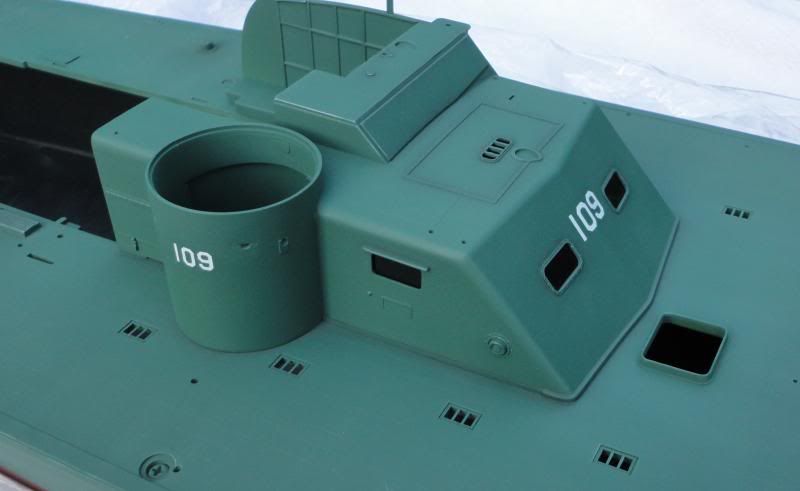
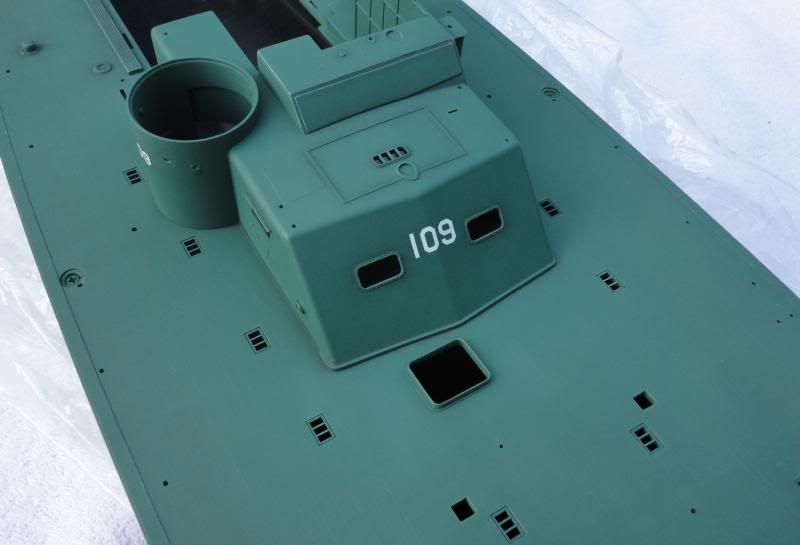
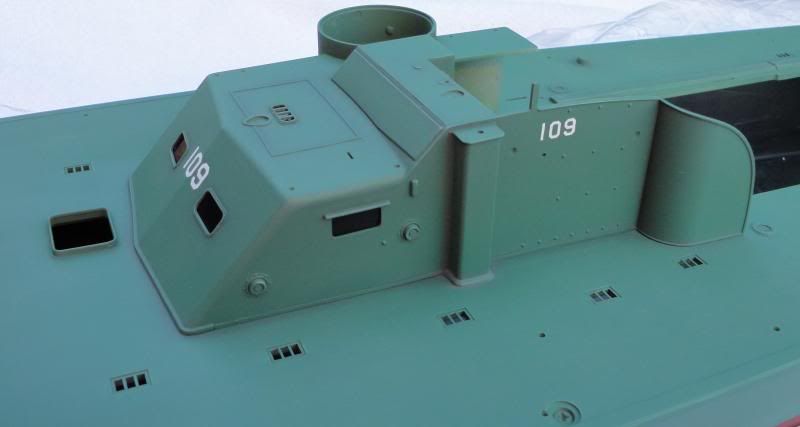
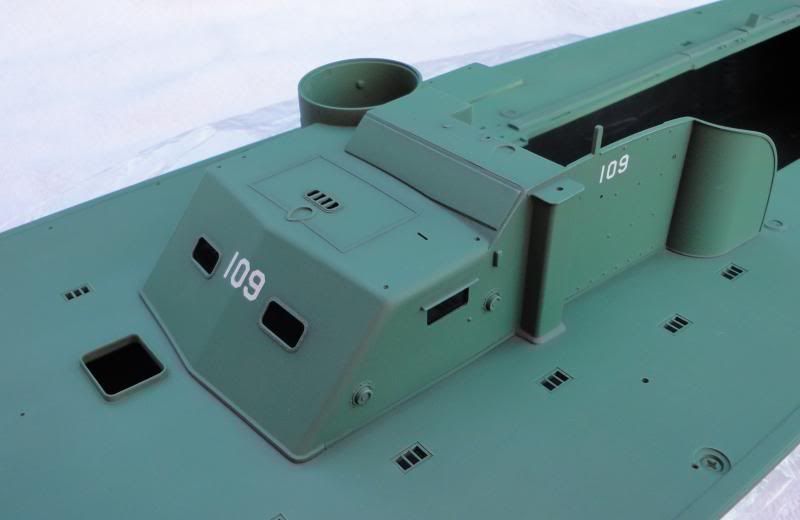
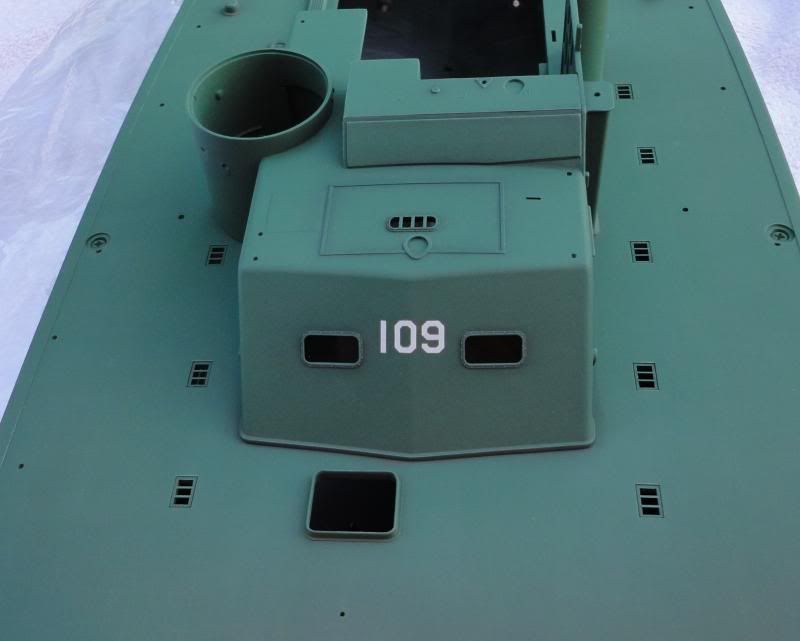
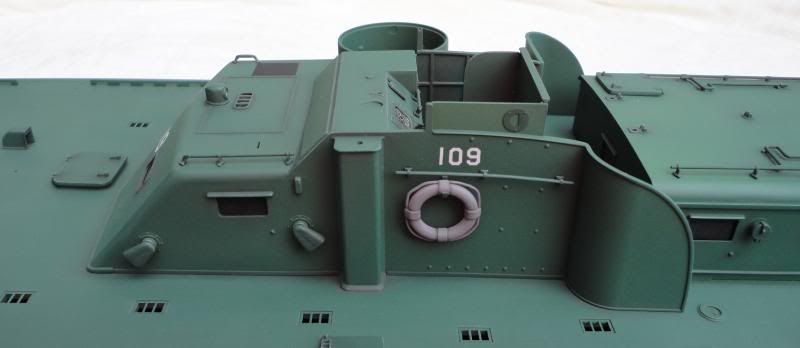
10th through 12th Image: These images show the chart room after adding the decals and windows. The decals are from an AeroMaster 1/48 Numbers and Letters Sheet (No.48-050B). The backside of the windows were painted flat black before being installed.
Until next time
Phillip
Posted By: Phillip Gore | Posted on: May 20, 2013 - 6:58pm
Total Posts: | Joined: Unregistered
Nicely done Phillip. I like the color you selected. Good choice on the lettering as well. I also like how you used the pastels for weathering. Thanks for sharing!
Dave
David Waples
Posted By: David Waples | Posted on: May 20, 2013 - 8:52pm
Total Posts: 1680 | Joined: Jan 2, 2007 - 9:55pm
Roy-Thanks for the compliment. I will not add dullcote since I have the finish I want. You are right that it is a mistake to add dullcote after pastel weathering has been applied.
David-Thanks for the compliments and continued support.
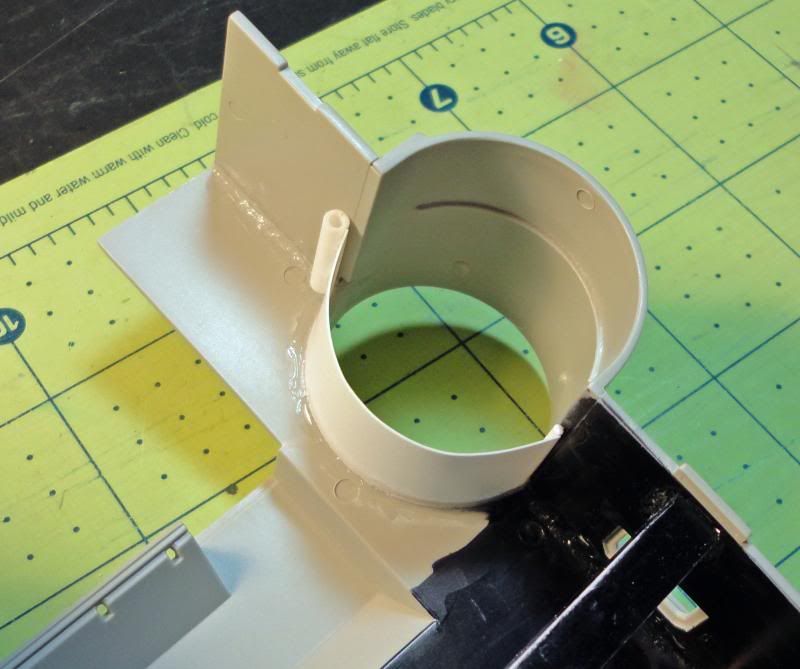
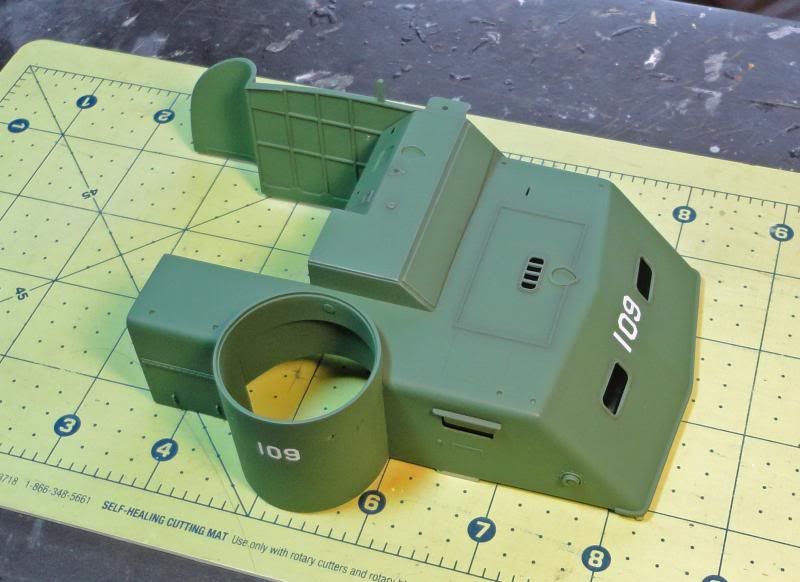
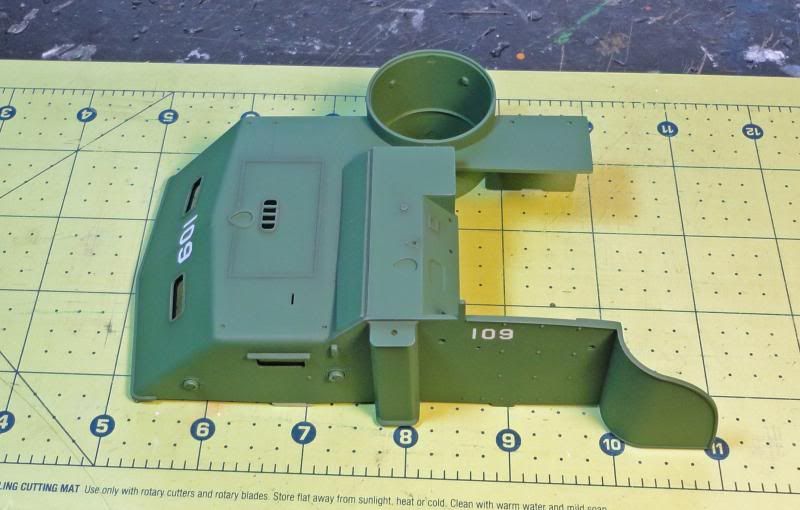
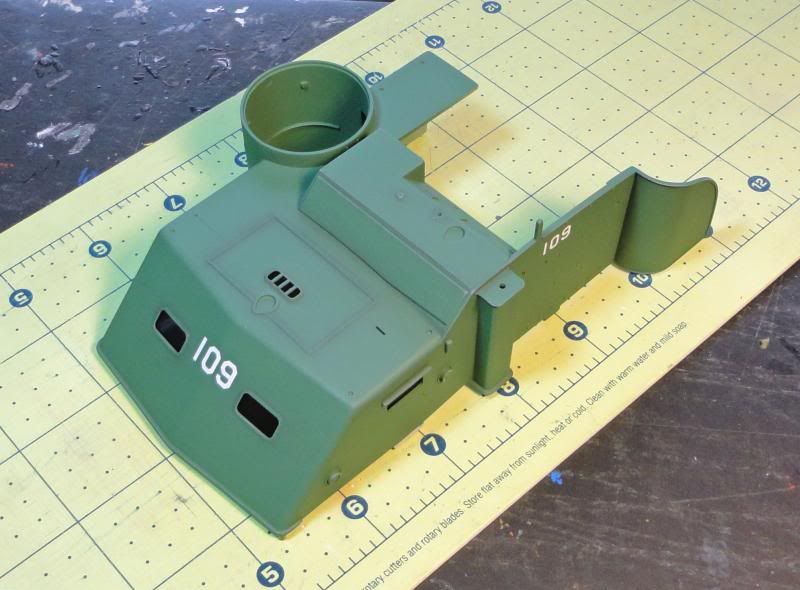
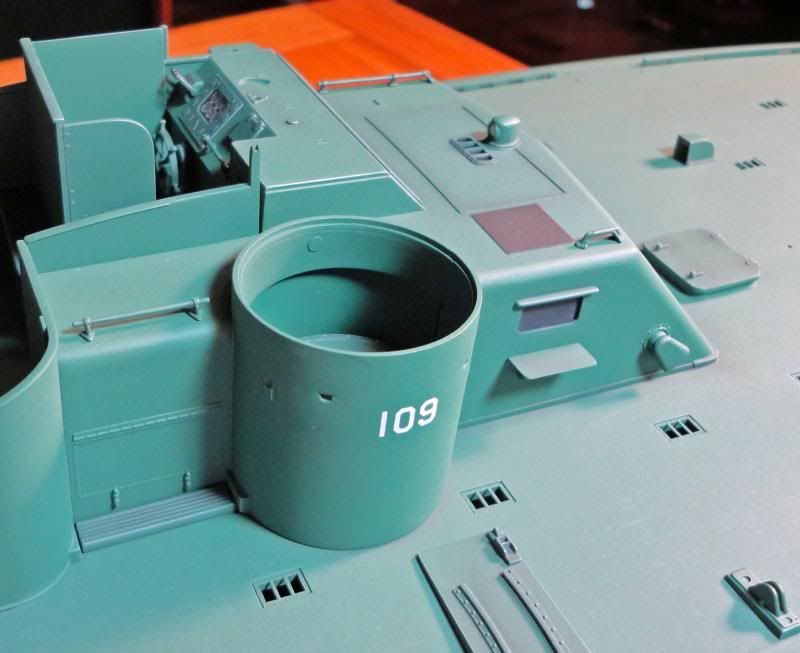
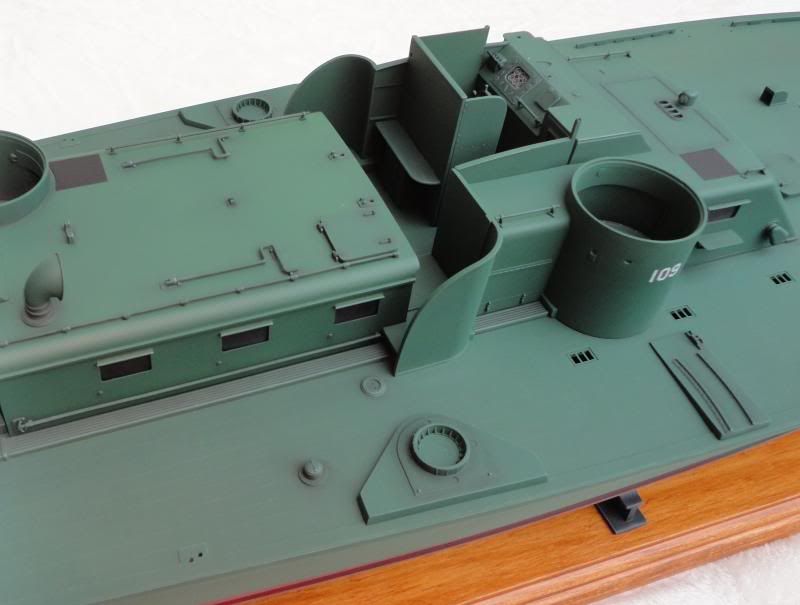
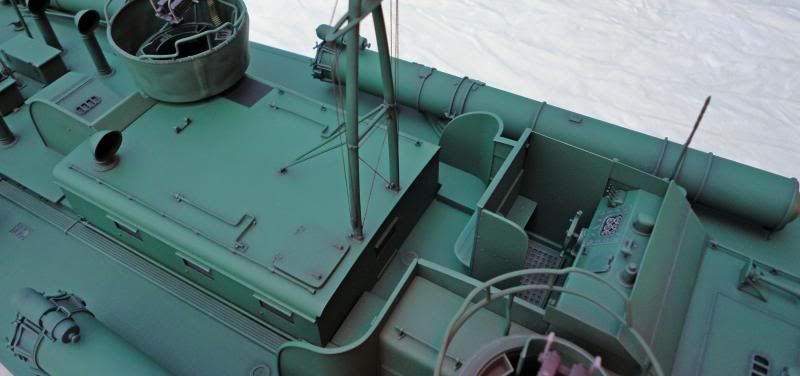
Greetings Fellow Modelers,
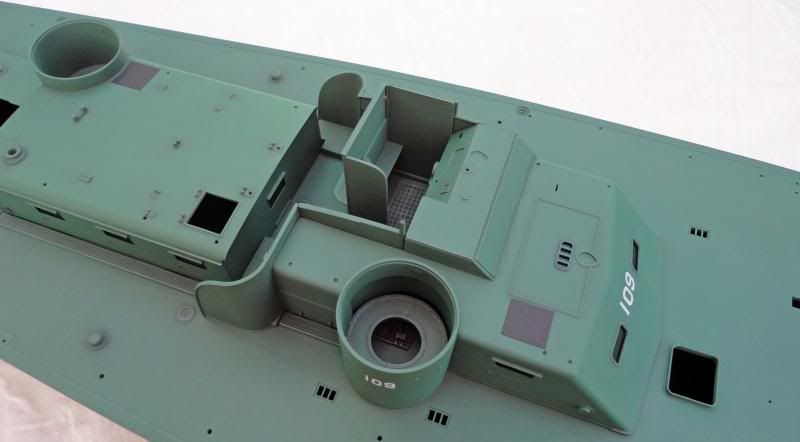
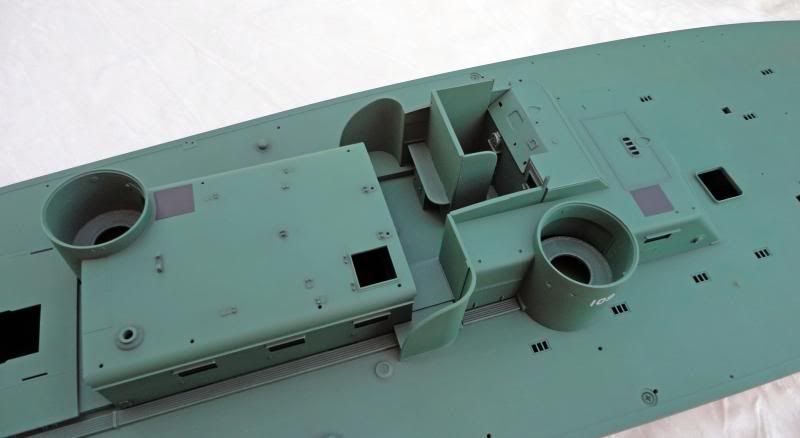
1st through 7th Image: Below are photos showing the chart house after being glued to the deck. I am happy with how it looks now, but a lot of work was required to get here. The rectangular hole Italeri cut from the middle of the deck part caused the inside edges to warp and twist (at least on my kit). I didnt really notice it until the superstructure pieces were test fitted over both sides of the hole. The first time I glued the chart house in place I did not apply enough pressure, and ended up with unacceptable gaps-making me an unhappy camper. I had to break the chart house loose from the deck, which damaged the assembly and damaged the paint finish on the deck. After a couple of hours of repair work I tried again. The second time the join was much better, although there were still some small gaps. The gap problem was eliminated by adding very thin styrene strips to cover the join line. It worked out well, but I am certainly glad it is over. I believe the same problem will come up again when the day cabin is attached, but to a lesser degree. Has anyone else experienced this issue? I hope you enjoy the photos.

Until next time
Phillip
Posted By: Phillip Gore | Posted on: May 24, 2013 - 5:25pm
Total Posts: | Joined: Unregistered
Fellow Modelers,
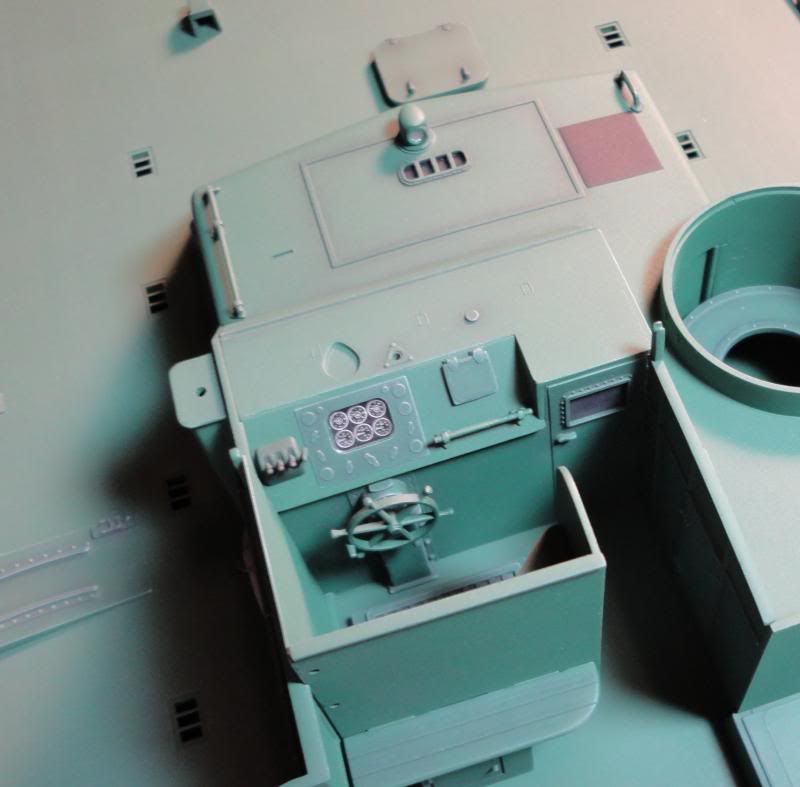
The latest progress photos are shown.
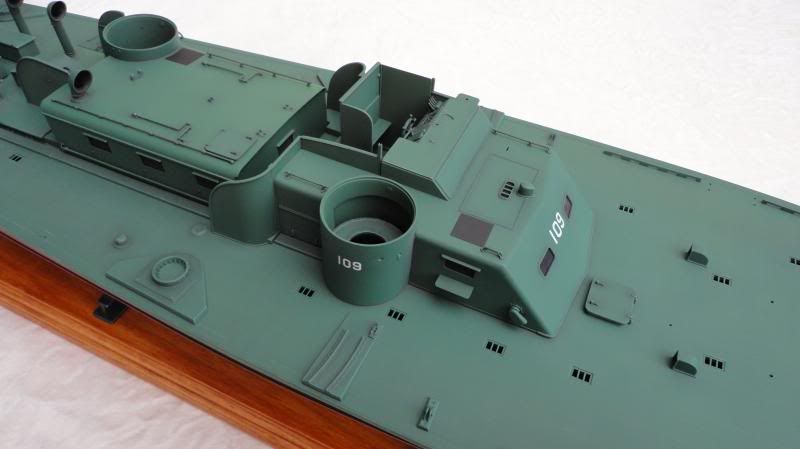
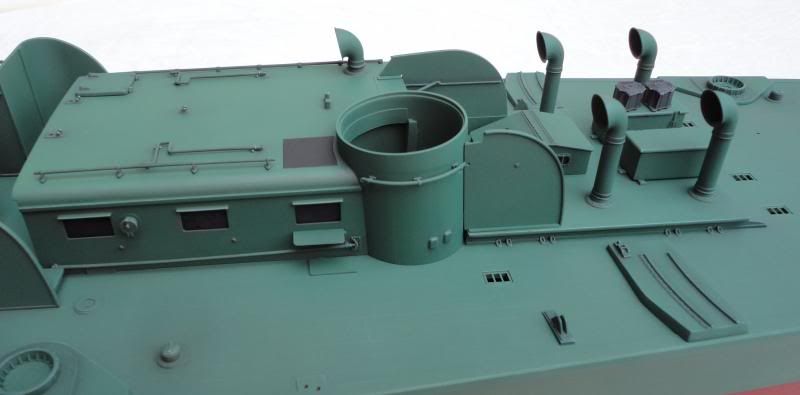
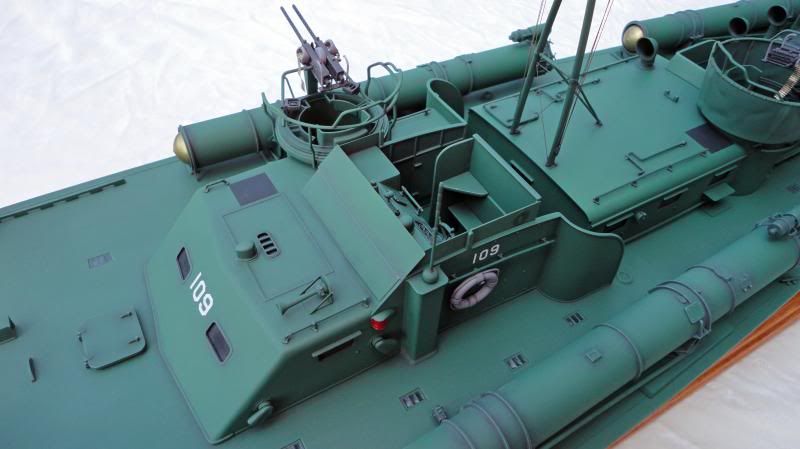
1st through 6th Image (taken outside-late afternoon): The main assembly is shown after the day cabin, engine hatch and all the cockpit walls have been added. These main pieces do not want to mate to the hull very well. I used small pieces Evergreen styrene to fill any noticeable gaps. The hull has been permanently attached to the base, which greatly reduces the possibility of damaging the hulls paint finish through handling. The propellers were painted brass, then the color was weathered/toned down with dark gray pastel powder.
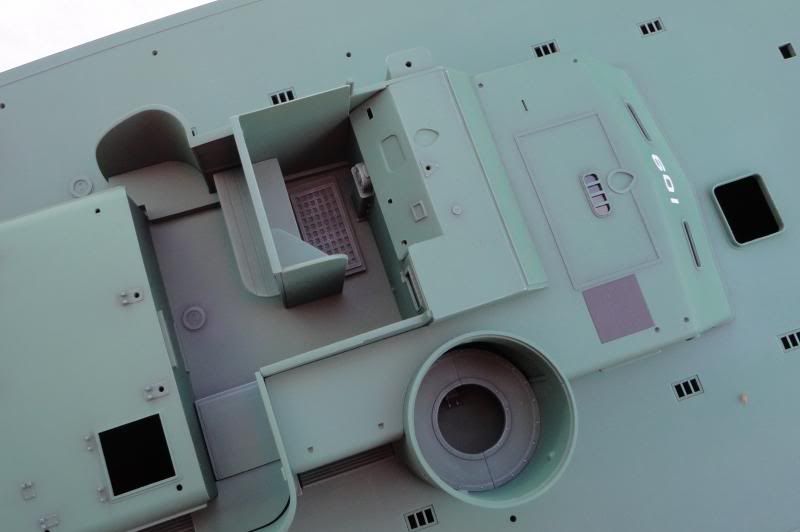
7th through 14th Image (taken inside without a flash under florescent lights): Many more deck details have been added. The cockpit is finished. I debated about what color to paint the life ring, and I am glad I went with light gray. It adds a nice contrast against the green. I also added dark gray pastel powder to the outside of all of the windows. I think it looks better and more realistic than having very shiny black openings.

Until next time...
Phillip
Posted By: Phillip Gore | Posted on: Jun 2, 2013 - 10:49am
Total Posts: | Joined: Unregistered
Phillip, very nice work, I may have to have you build me one for my Exhibit, your use of colors and brushing to add wear in certain spots is really good. I know we are all looking forward to seeing the finished product, which you can ship to me anytime, oops sorry Dave.
Posted By: Frank Andruss | Posted on: Jun 2, 2013 - 4:44pm
Total Posts: 3964 | Joined: Feb 9, 2007 - 11:41am
I saw two Italeri PTs last weekend (one by Pat Hutchens and the other by Roy Forbes that is still in process) at the Mount Airy get together and I must say just how impressively detailed these models are. They are flat out georgeous.
My only comment is with the exhaust system (that is the flapper valves and the rods that drive them). The horizontal and vertical rods are far too thick on the model. See this photo below (which is the 109) and see if you can see the rods. Yes but far less than on the Italeri model. Again I love theie model but a little rework could make this even more accurate.
[image]http://i130.photobucket.com/albums/p249/ptboats/Bridge%20Carney/USNAchives19-N-33167.jpg[/image].
and this one from the 157 model...
[image]http://i130.photobucket.com/albums/p249/ptboats/Bridge%20Carney/P1010751_bk.jpg[/image]
Look at the details of original ELCO blueprints from the Dick Washichek collection (such as ELCO_Roll_5535-4_72SCAN_00468 .PDF and ELCO_Roll_5535-4_72SCAN_00469 .PDF) which show the horizontal and vertical rods were, in full scale, only 5/16 in diameter. That is 0.3125 which at 1:35 scale is .00893.
In brass and aluminum that is 31 gauge wire.
In music that is 0 gauge wire.
In steel that is 36 gauge wire.
When I did the 157 model I went to a musical shop and gave them a precise number and they produce a string that was a direct match! Music wire is a SOB to work with but it so very accurate. You may even want to get wire that is a hair smaller to allow for the paint build up during painting.
I think the vertical rod actuator levers could use some work as well as the flapper vales themselves but that is another story for another day.
Bridge
Posted By: TheBridge | Posted on: Jun 2, 2013 - 7:26pm
Total Posts: 319 | Joined: Nov 22, 2009 - 3:04pm
Frank-Thanks for the compliment. It is greatly appreciated.
TheBridge-Thanks for the suggestion on the exhaust system, and for posting the model photo. It shows excellent super-detailing work. I am trying to stay close to "box stock" with my build, so I am content with the kit parts even though they do not look near as nice as what you posted. I am hoping be be finished in the next 2-3 weeks, and plan on posting a large number of completed photos.
Thanks
Phillip
Posted By: Phillip Gore | Posted on: Jun 3, 2013 - 10:23am
Total Posts: | Joined: Unregistered
Phillip - that's cool. It is great looking model you got going there!
Posted By: TheBridge | Posted on: Jun 3, 2013 - 11:09am
Total Posts: 319 | Joined: Nov 22, 2009 - 3:04pm
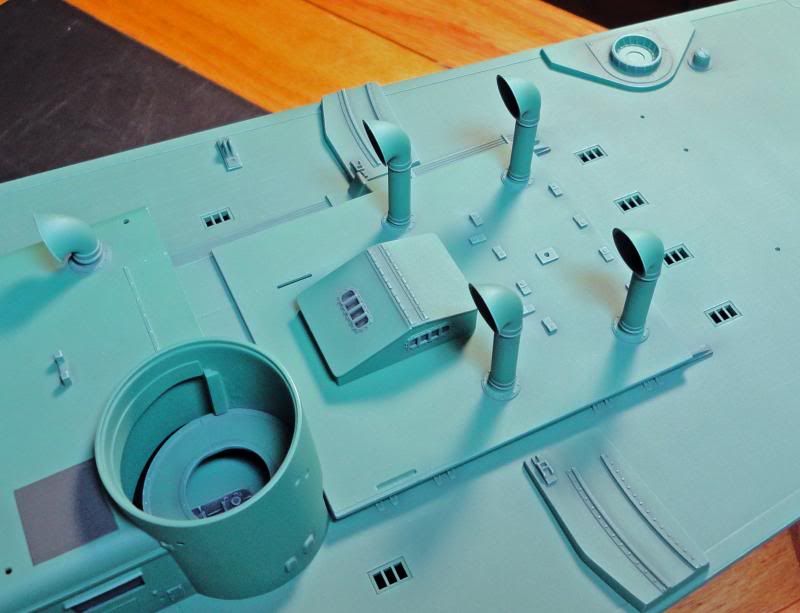
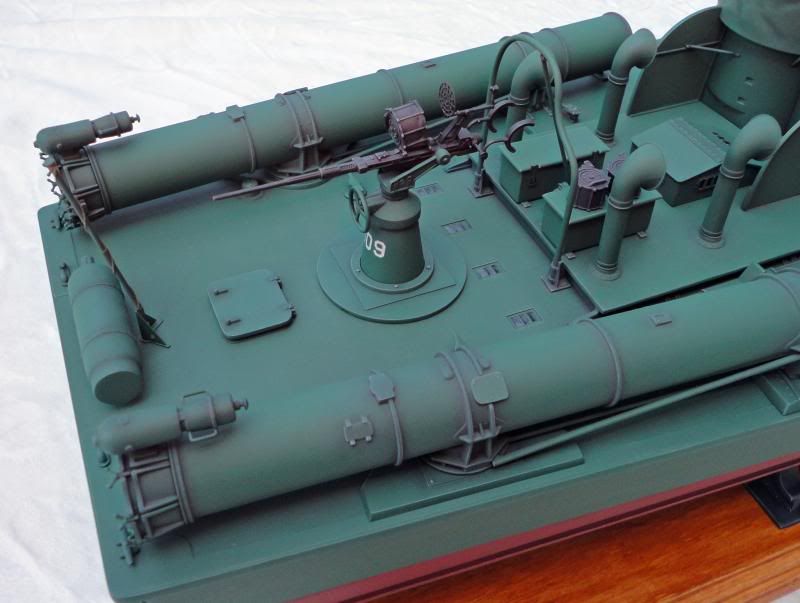
Fellow Modelers,
1st through 11th Image: The following photos show some progress (about 25-30 more pieces added), but I post them mainly because they were taken under what I consider near perfect lighting conditions. This is outside on a sunny day with lots of white cloud cover. The shots are taken when a cloud blocks the sun and acts a filter-not really changing the actual color of the subject, but not casting any hard shadows either. Enjoy the photos.

Until next time...
Phillip
Posted By: Phillip Gore | Posted on: Jun 11, 2013 - 5:06pm
Total Posts: | Joined: Unregistered
Thanks for sharing Phillip. She's looking good.
Dave
David Waples
Posted By: David Waples | Posted on: Jun 12, 2013 - 9:56pm
Total Posts: 1680 | Joined: Jan 2, 2007 - 9:55pm
Phillip,
Nice shading technique. Looking very nice.
Best Regards,
Stu.
Posted By: Stuart Hurley | Posted on: Jun 12, 2013 - 10:25pm
Total Posts: 255 | Joined: Mar 19, 2013 - 3:32am
David Waples-Thanks for the compliment. I am looking forward to the next progress update on you PT Boat.
Stuart Hurley-Thanks for the compliment. By the way, the correction/modification work you have been doing to your PT-109 is very impressive and entertaing, and I hae been following it closely.
Phillip
Posted By: Phillip Gore | Posted on: Jun 13, 2013 - 1:55pm
Total Posts: | Joined: Unregistered
Thank you Phillip.
Best Regards,
Stu.
Posted By: Stuart Hurley | Posted on: Jun 13, 2013 - 11:09pm
Total Posts: 255 | Joined: Mar 19, 2013 - 3:32am
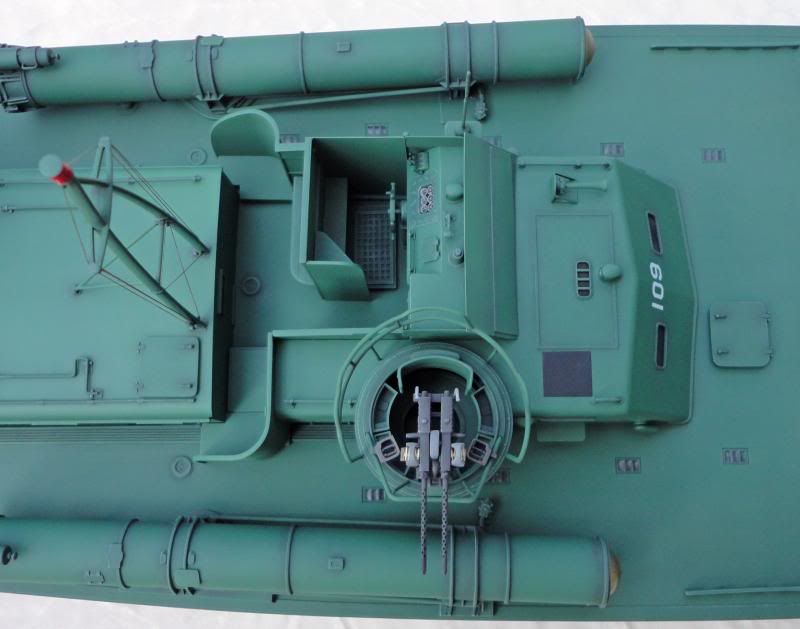
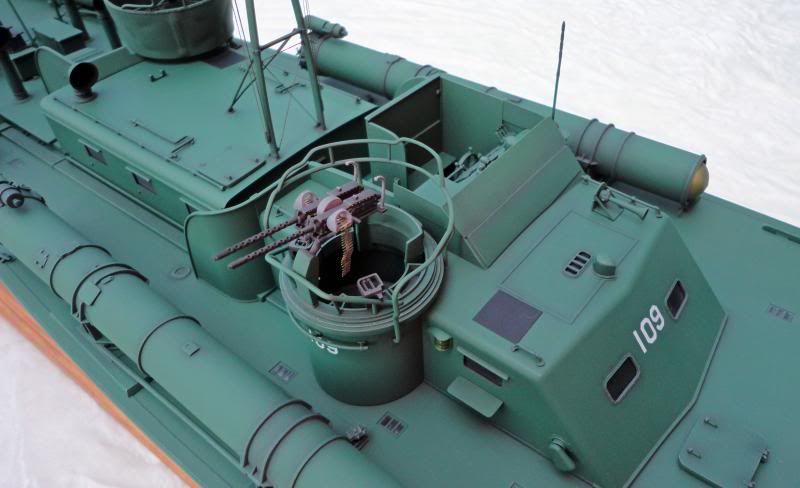
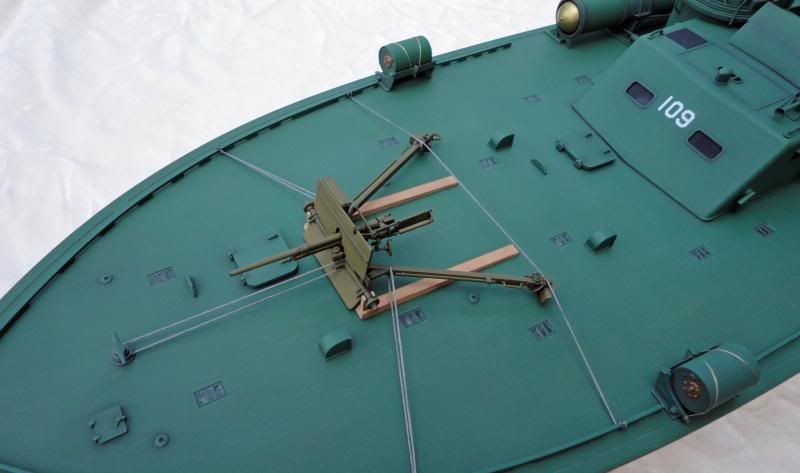
Fellow Modelers,
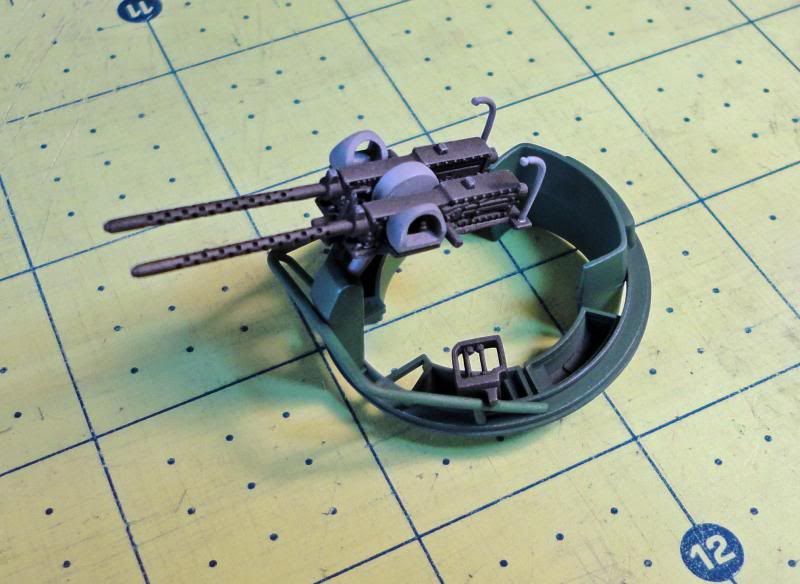
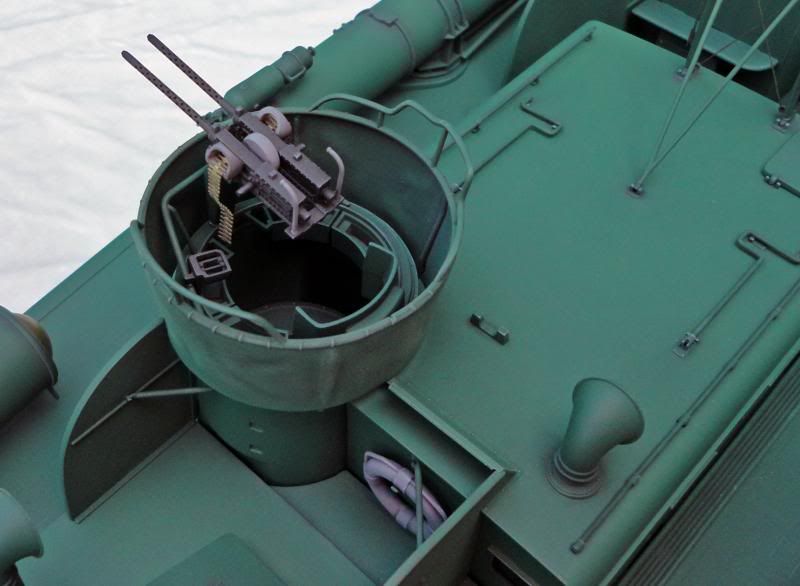
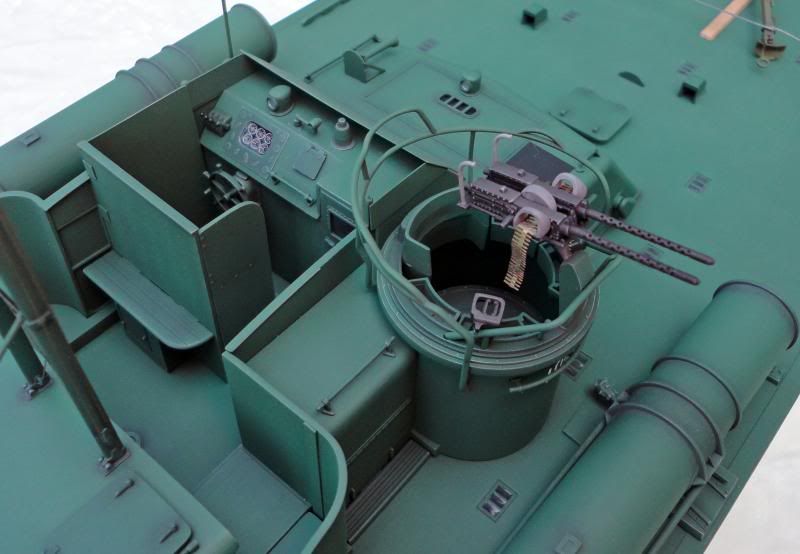
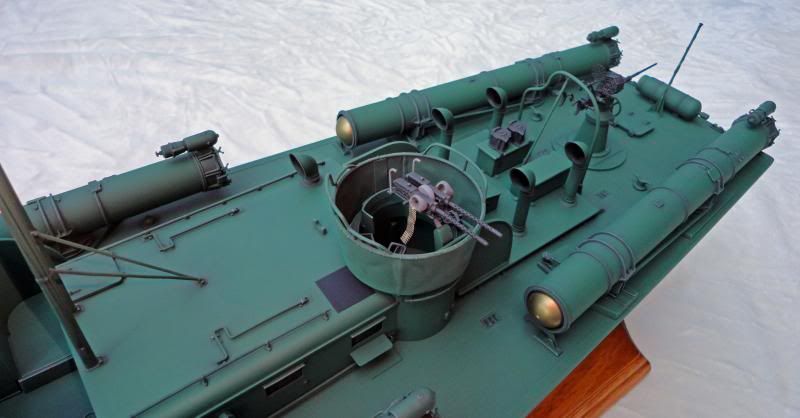
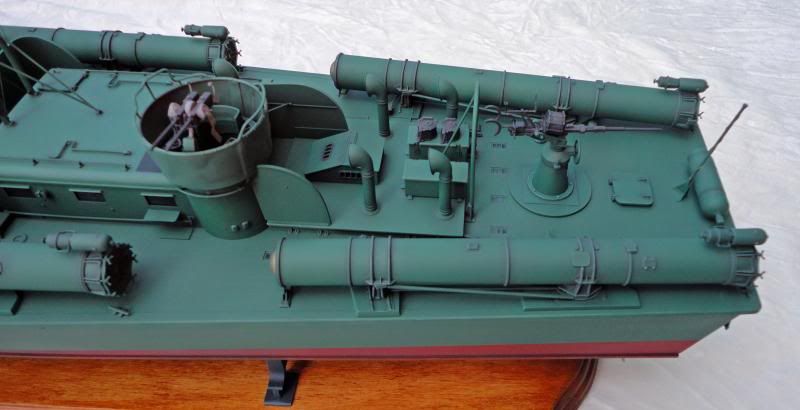
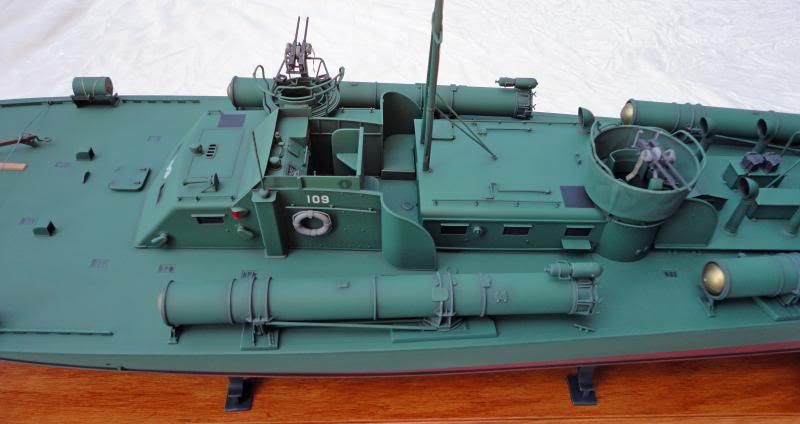
1st through 10th Image: These are probably the last construction photos before the model is finished. If you look close at the .50 cal. machine gun assembly you can see the guns were placed upside down. I only noticed it after both assemblies were glued to the boat. Its not that big of a deal-just irritating. Also, note the base ring for the rear turret had to be modified so it would fit inside the canvas spray shield.

Until next time...
Phillip
Posted By: Phillip Gore | Posted on: Jun 19, 2013 - 8:21pm
Total Posts: | Joined: Unregistered
Nice job. . .
Will
Posted By: Will Day | Posted on: Jun 19, 2013 - 9:24pm
Total Posts: | Joined: Unregistered
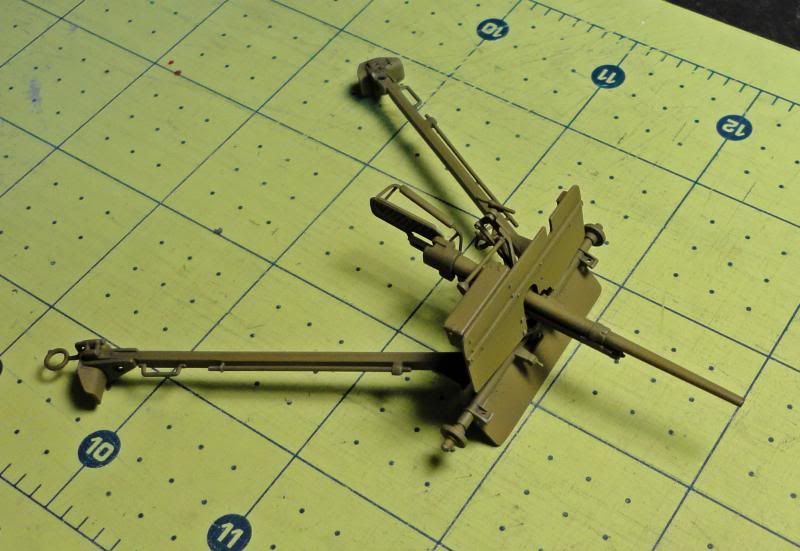
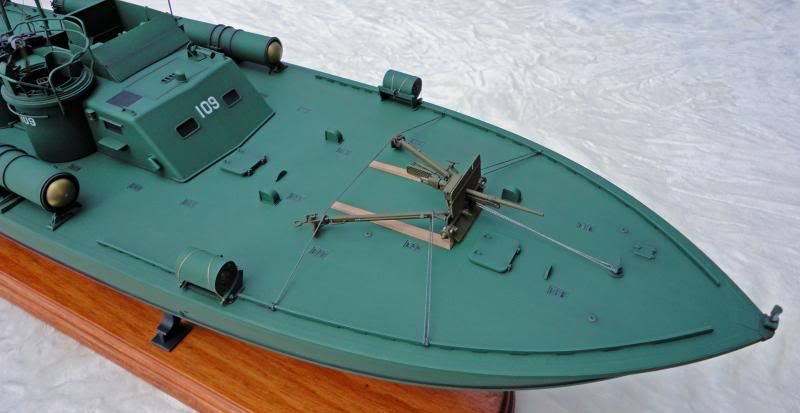
Well done Phillip. Looking forward to the wrap up. I didn't notice the .50's until you mentioned it. I especially like how the 37mm came out. Your build has reinforced my belief that I want to keep the deck lines on the kit.
Thanks for sharing your work!
Dave
David Waples
Posted By: David Waples | Posted on: Jun 20, 2013 - 4:50am
Total Posts: 1680 | Joined: Jan 2, 2007 - 9:55pm
Phil, the boat looks so Beautiful, just ship it to my Exhibit when you are done, lol............
Posted By: Frank Andruss | Posted on: Jun 20, 2013 - 2:43pm
Total Posts: 3964 | Joined: Feb 9, 2007 - 11:41am
Phil, the boat looks so Beautiful, just ship it to my Exhibit when you are done, lol............
Posted By: Frank Andruss | Posted on: Jun 20, 2013 - 2:43pm
Total Posts: 3964 | Joined: Feb 9, 2007 - 11:41am
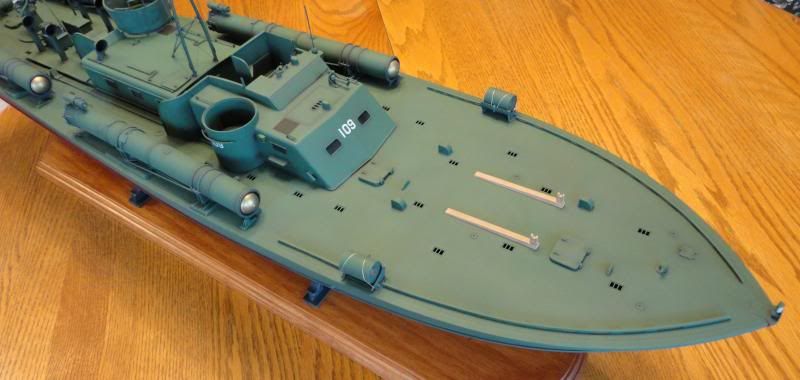
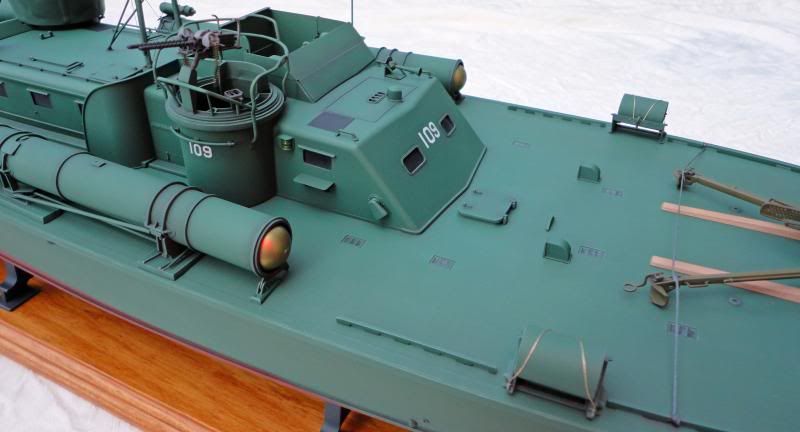
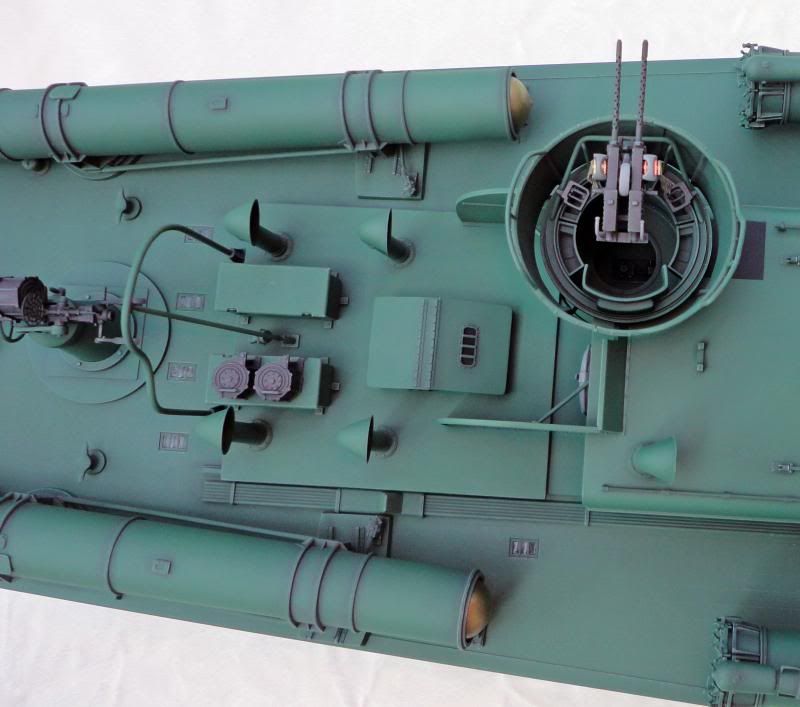
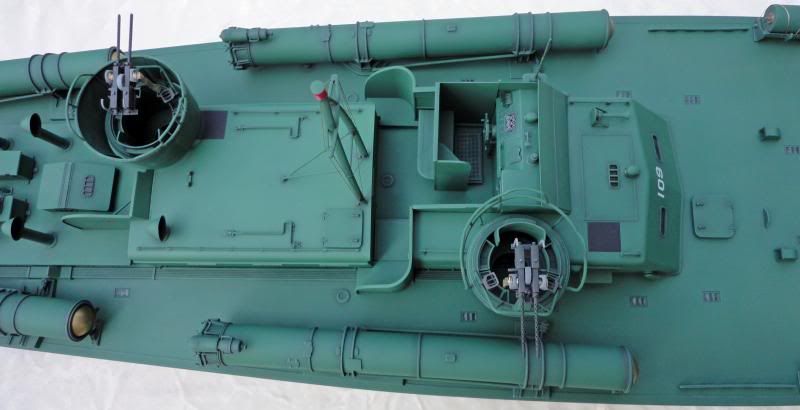
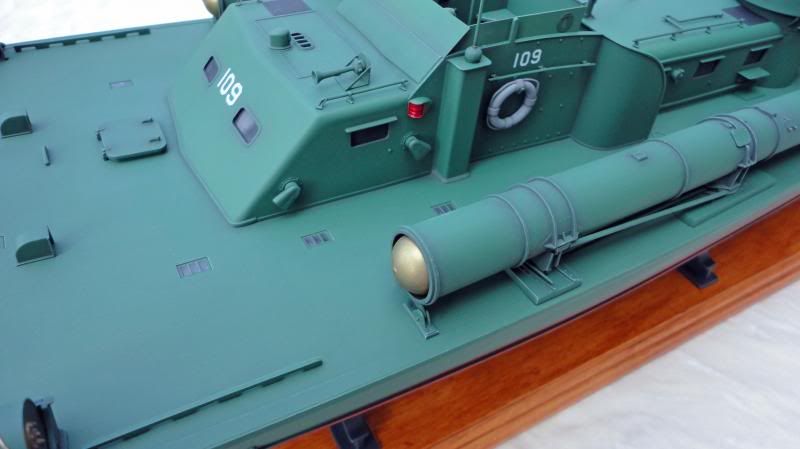
Fellow Modelers,
I finished my PT-109 last night! The last items added were photo-etch .50 caliber ammo belts and Krystal Kleer for the deadlight deck openings.
1st through 23rd Image: Here are some photos I took outside this morning. I was not able to get any decent overall shots. Hopefully in the next couple of days I will be able to post more photos on a new thread. At that time I will share some thoughts about my build and what I think about the kit. Enjoy.
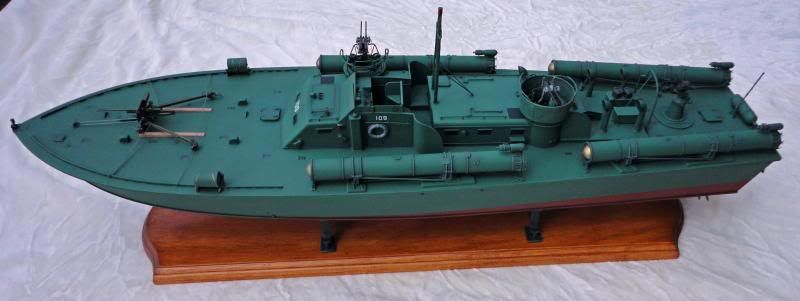
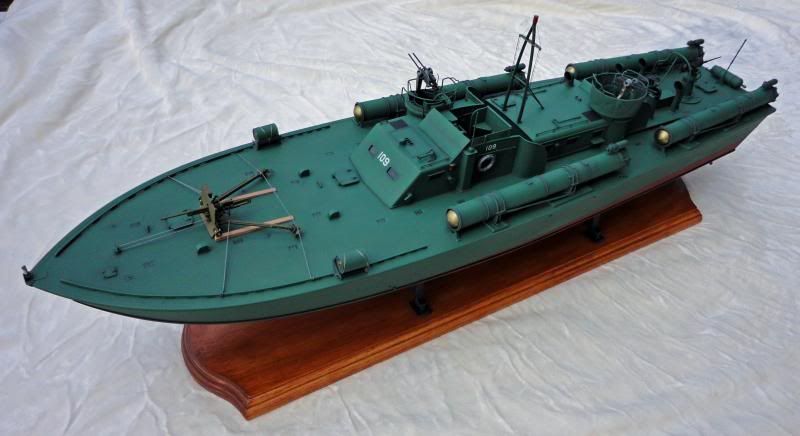


Until next time
Phillip
Posted By: Phillip Gore | Posted on: Jun 22, 2013 - 5:55pm
Total Posts: | Joined: Unregistered
Good job...
Will
Posted By: Will Day | Posted on: Jun 22, 2013 - 7:49pm
Total Posts: | Joined: Unregistered
Beautiful job, love your use of colors and pastels. She is a first rate job.............................
Posted By: Frank Andruss | Posted on: Jun 22, 2013 - 10:36pm
Total Posts: 3964 | Joined: Feb 9, 2007 - 11:41am
Beautiful job, love your use of colors and pastels. She is a first rate job.............................
Posted By: Frank Andruss | Posted on: Jun 22, 2013 - 10:36pm
Total Posts: 3964 | Joined: Feb 9, 2007 - 11:41am
Nice work Phillip. I really appreciate you sharing your work with us.
Dave
David Waples
Posted By: David Waples | Posted on: Jun 23, 2013 - 5:47am
Total Posts: 1680 | Joined: Jan 2, 2007 - 9:55pm
Phillip, It looks great!
Posted By: Bob Butler | Posted on: Jun 23, 2013 - 12:31pm
Total Posts: | Joined: Unregistered


